• العربية
  • Azerbaijani
  • Català
  • 中文
  • Hrvatski
  • Čeština
  • Dansk
  • Nederlands
  • English
  • Estonian
  • Persian
  • Français
  • Deutsch
  • עברית
  • Magyar
  • Italiano
  • Macedonian
  • Norwegian
  • Português
  • Português
  • Română
  • Русский
  • Español
  • Svenska
  • Türkçe
  • Українська
  • Účet
    • Přihlášení
    • Registrace
    • Zapomněli jste heslo?
  • FairyHosting.com
    • Services
      • Moje služby
      • Objednejte si nové služby
      • Domény
      • DNS MANAGER
    • Payment
      • Invoices
      • Vložit finanční kredit
      • Hromadná platba
    • Support
    • Knowledgebase

      Kategorie

    Hestia CP
    2
    ISPmanager
    9
    Linux Сервер
    25
    Plesk
    14
    Windows Сервер
    14
    Услуга Fairy Disk
    4
    Микротик (RouterOS)
    8
    Менеджмент сервера
    19
    Для нового клиента
    13

      Kategorie

      Mrak tagů

    Debian Восстановление root пароля CentOS7 Linux сброс root пароля CentOS7 сервер Password recovery Root password Ubuntu

      Podpora

    Moje support tickety
    Databáze řešení
    Otevřít ticket

    Creating a database and database user View PDF

    • 0

    Creating a database and database user


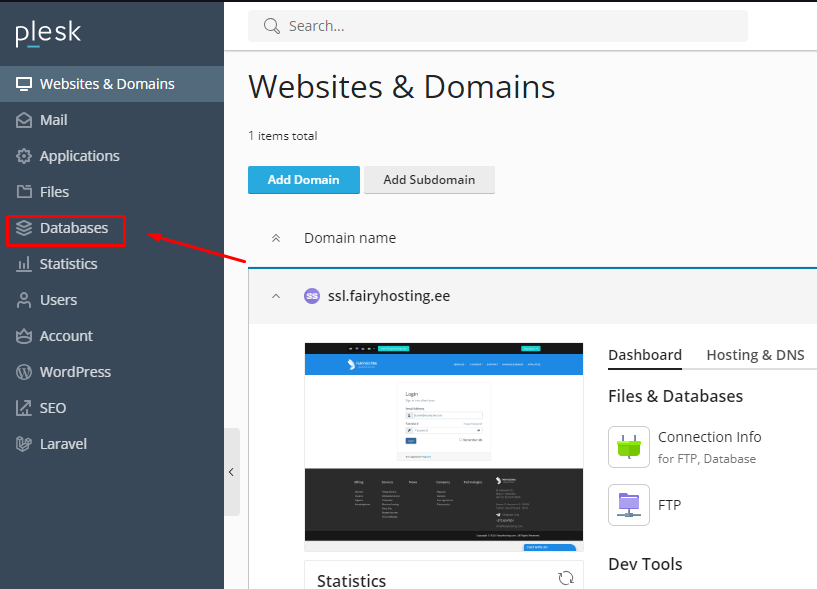
    To create a database, log in to the Plesk control panel. In the left menu, select the "Databases" section.

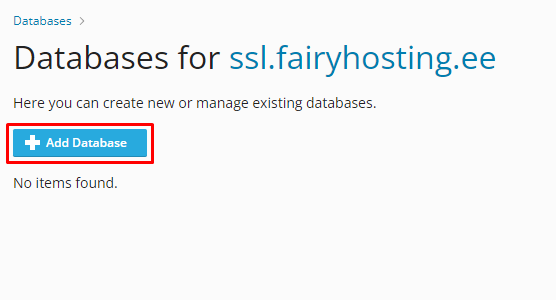
    Click on the "Add Database" button.

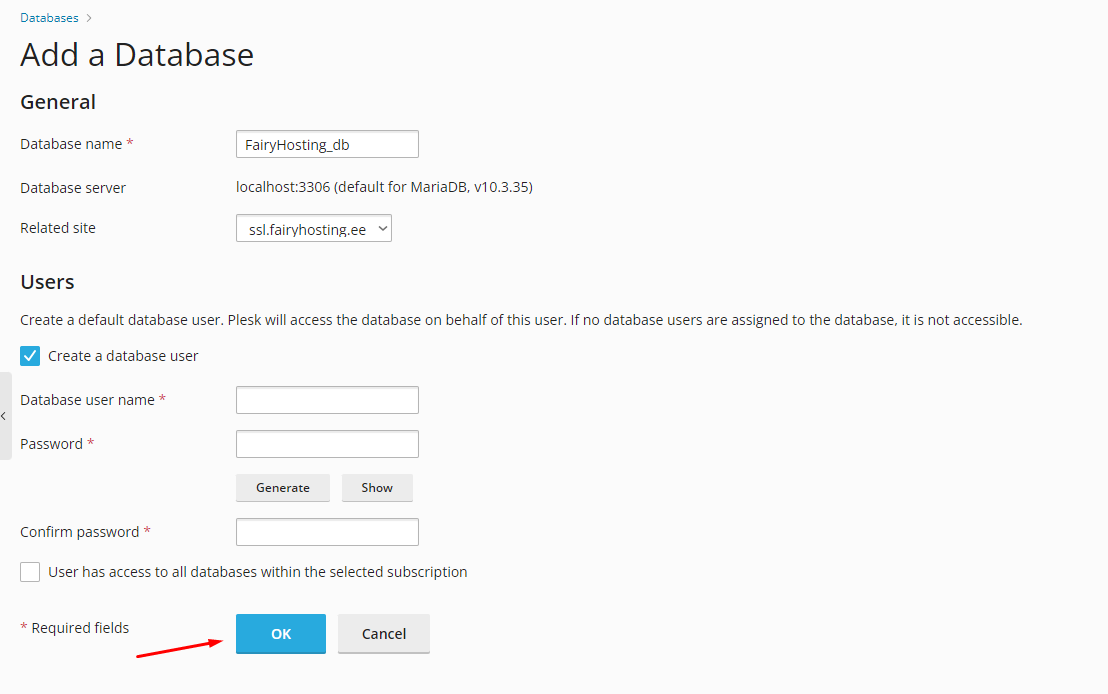
    You will be directed to the database creation page. Enter the database name and choose which website it will belong to.

    You can also create a user for this database and grant access to all existing and future databases. After entering all the necessary data, click on the "OK" button.

    The database has been created. If you need to create a user, click on the "User Management" section.

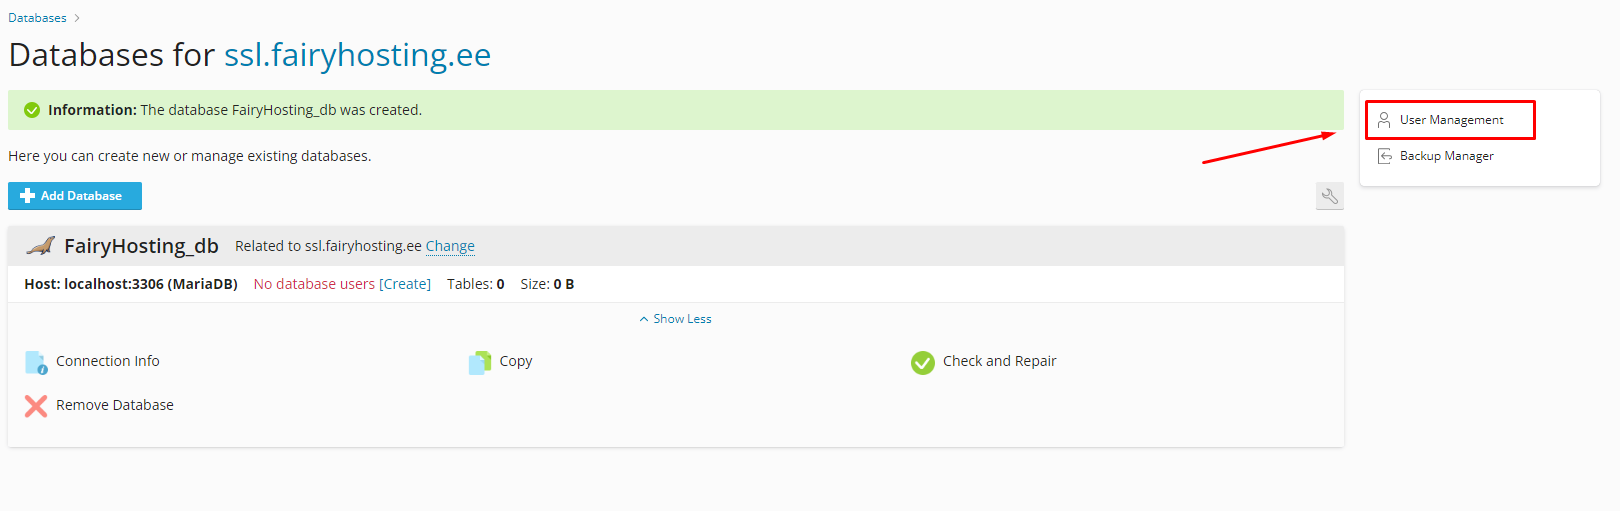
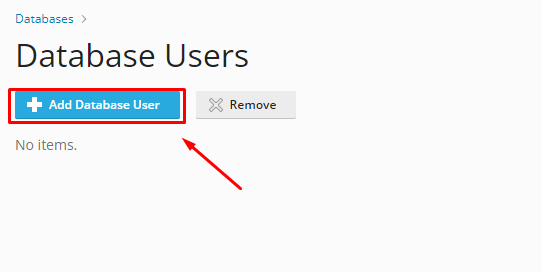
    In this section, all existing database users will be displayed. You can delete them and edit their permissions.

    Click on "Add Database User" to create a database user.

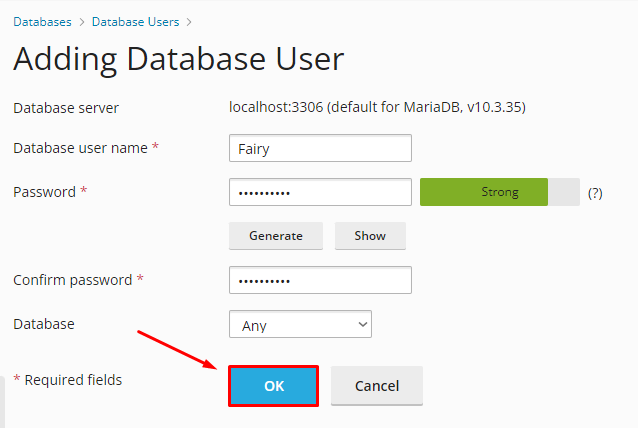
    Then enter the database user's name, password, and select which database the user will manage. If desired, you can grant access to manage all databases. After filling in all the required fields, click "OK".

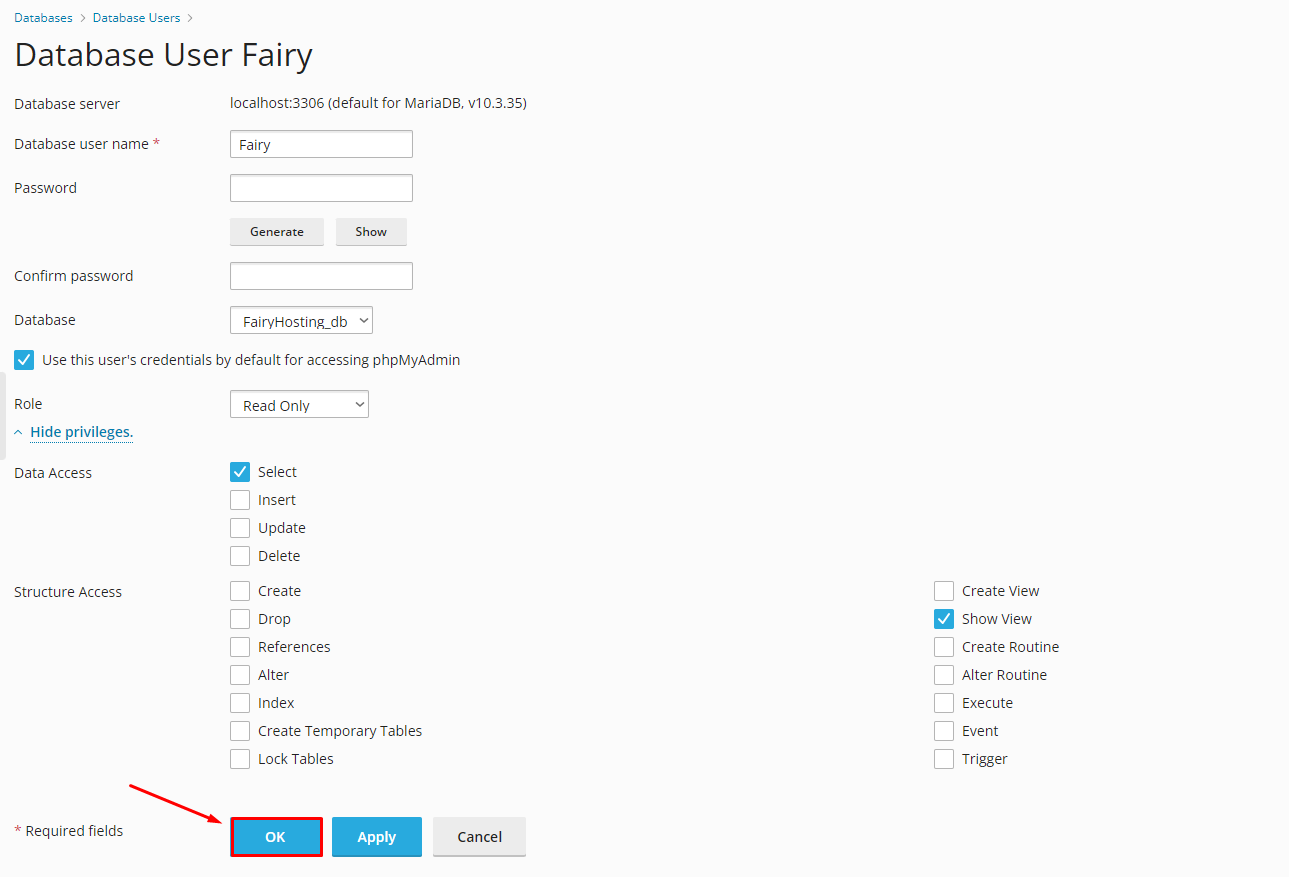
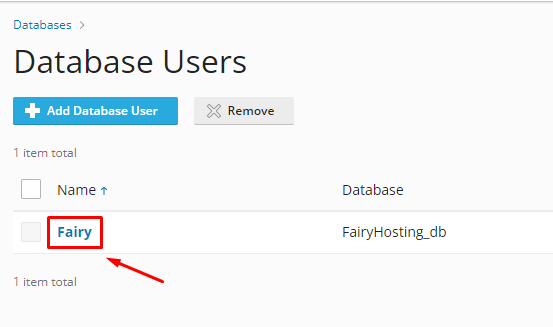
    The database user has been created. To edit the user's permissions, click on the username.

    On this page, you can change the password. If you don't need to change the password, leave these fields blank. Below, you can select the user's role. Let's choose the "Read Only" role. The user will only be able to view the contents of the database, but other actions will be unavailable. To apply all changes, click "OK".


    Byla tato odpověď nápomocná?

    Související články

    Setting up a Let's Encrypt certificate for the website The security of your website is an integral part of a successful online presence. Security... Installing a Let's Encrypt certificate for email In this article, we will discuss two methods of installing a Let's Encrypt certificate for email.... Creating a Backup Creating a Backup   To create a backup, log in to the Plesk control panel, then select the... WordPress CMS install WordPress CMS install   WordPress is a free and open-source content management system (CMS)... How to add an additional user How to add an additional user   To create an additional user, log in to the Plesk control...
    << Zpět

      Mrak tagů

    Debian Восстановление root пароля CentOS7 Linux сброс root пароля CentOS7 сервер Password recovery Root password Ubuntu

      Podpora

    Moje support tickety
    Databáze řešení
    Otevřít ticket
    • Billing
      • Services
      • Invoices
      • Support
      • Knowledgebase
    • Services
      • Virtual servers
      • Dedicated servers
      • Colocation
      • Business hosting
      • Fairy Disk
      • Routers for rent
      • SSL-Certificates
    • News
    • Company
      • About Us
      • Contacts
      • User agreement
      • Privacy policy
    • Technologies

      RJ Network OÜ
      Reg.nr 14694302
      VAT ID: EE102147829

      Narva: P. Kerese tn 5, 20309
      Tallinn: Paul Pinna 8, 13615

    +372 6647001

    [email protected]

    Copyright © 2025 FairyHosting.com. All Rights Reserved.


    Nahrávání...
    Nahrávání...
    Vyberte jazyk
    العربية
    Azerbaijani
    Català
    中文
    Hrvatski
    Čeština
    Dansk
    Nederlands
    English
    Estonian
    Persian
    Français
    Deutsch
    עברית
    Magyar
    Italiano
    Macedonian
    Norwegian
    Português
    Português
    Română
    Русский
    Español
    Svenska
    Türkçe
    Українська

    Generovat heslo

    Zadejte prosím číslo mezi 8 a 64 pro délku hesla