


WireGuard is a modern VPN protocol and open-source software designed to create secure and fast tunnels between devices, providing data encryption and transmission over protected internet channels. Redirecting all traffic through WireGuard is essential for ensuring security, privacy, and convenience when working online. A VPN allows you to bypass geographical restrictions and access blocked resources.
To begin, download and install WireGuard on the client side to connect to the server: https://www.wireguard.com/install/
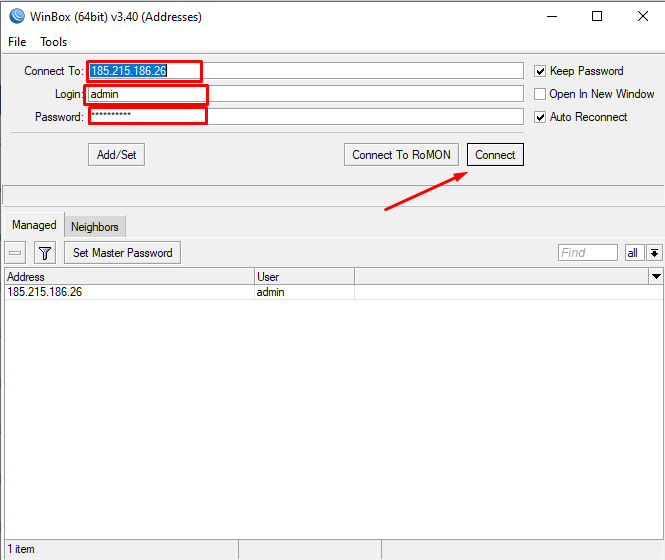
After installing WireGuard, connect to RouterOS via Winbox. If Winbox is not installed, you can download it from this link: https://mikrotik.com/download
Enter the address of your server/router, your login, and password. Then click the “Connect” button to access RouterOS.
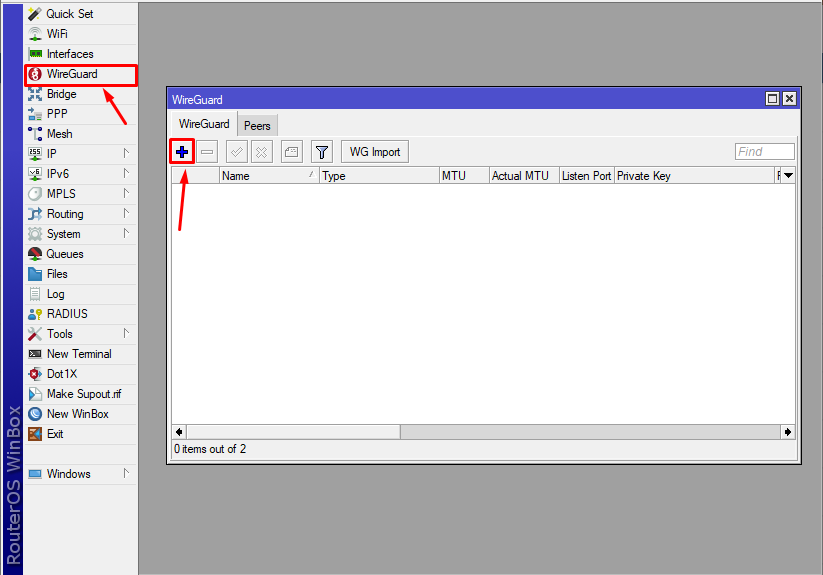
Open the WireGuard section and create a new interface.
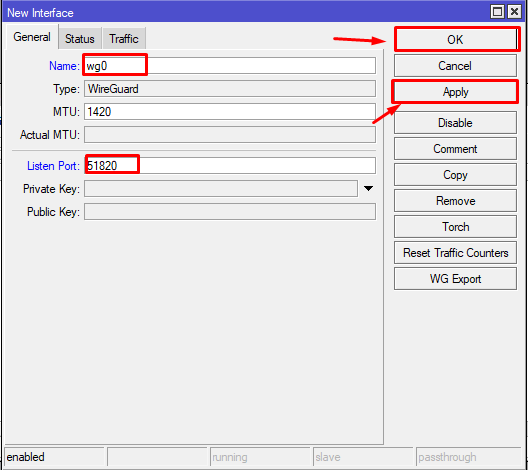
Name the interface wg0 and change the port to 51820. Click the “Apply” button, then “OK”. The server's public and private keys for WireGuard will be generated automatically.
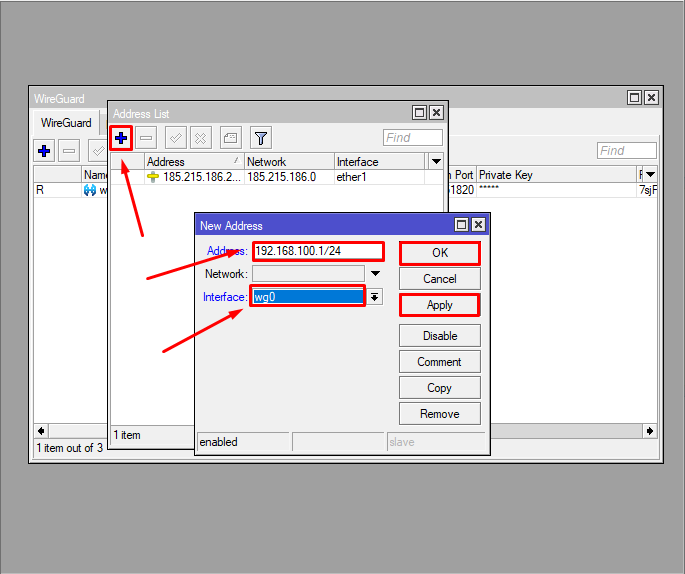
Now go to the IP - Addresses section.
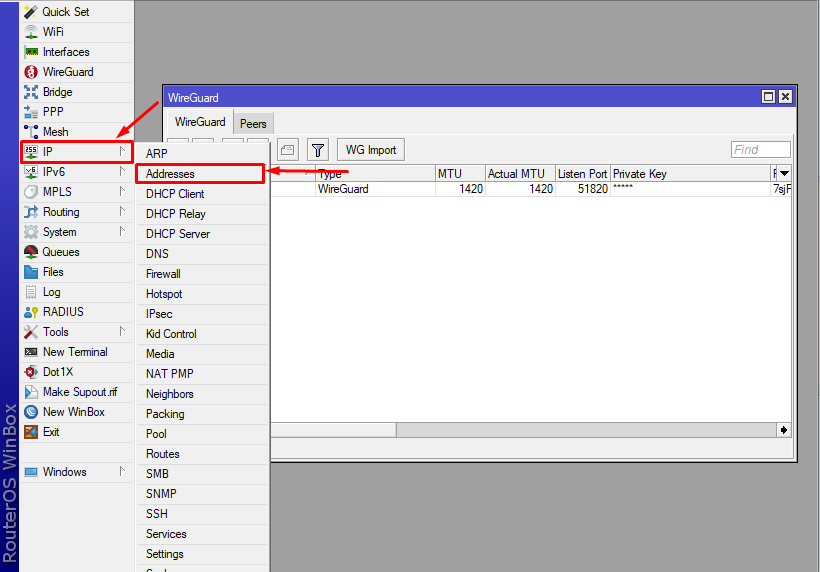
We need to add a subnet of internal IP addresses that will be assigned to the WireGuard server users.
Click the “+” button.
In the Address field, enter 192.168.100.1/24.
In the Interface field, select the created WireGuard interface – wg0.
Then click the “Apply” and “OK” buttons.
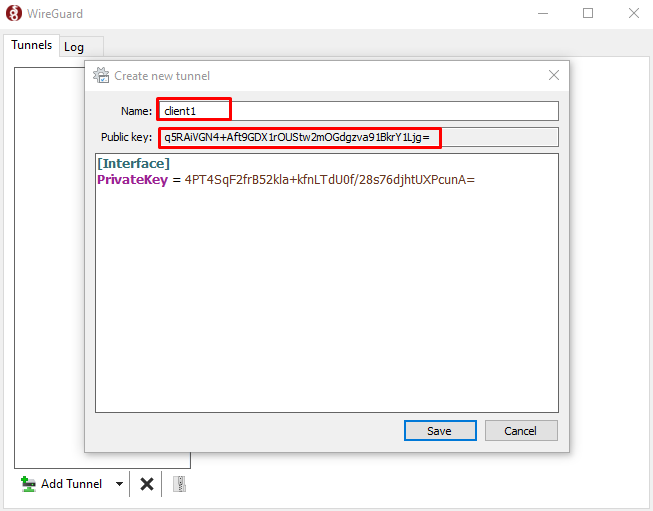
Now we need to add a client to the WireGuard server.
Open the WireGuard application on your computer.
Press the “CTRL + N” key combination. Name the profile and copy the Public Key.
In RouterOS, go back to the WireGuard section, open the Peers tab, and click the “+” button.
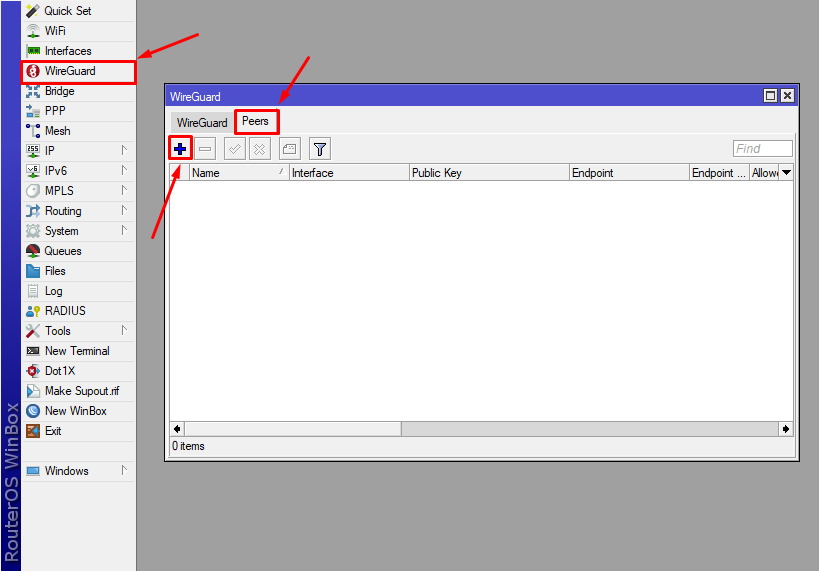
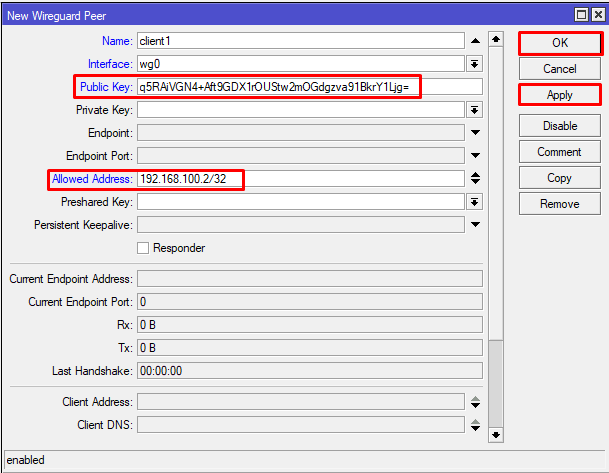
In the opened window, enter the client name. Paste the public key copied from the WireGuard client into the Public Key field.
In the Allowed Address field, specify the IP address that will be assigned to the client. Enter 192.168.100.2/32 (a /32 subnet means a single IP address).
Click the “Apply” and “OK” buttons.
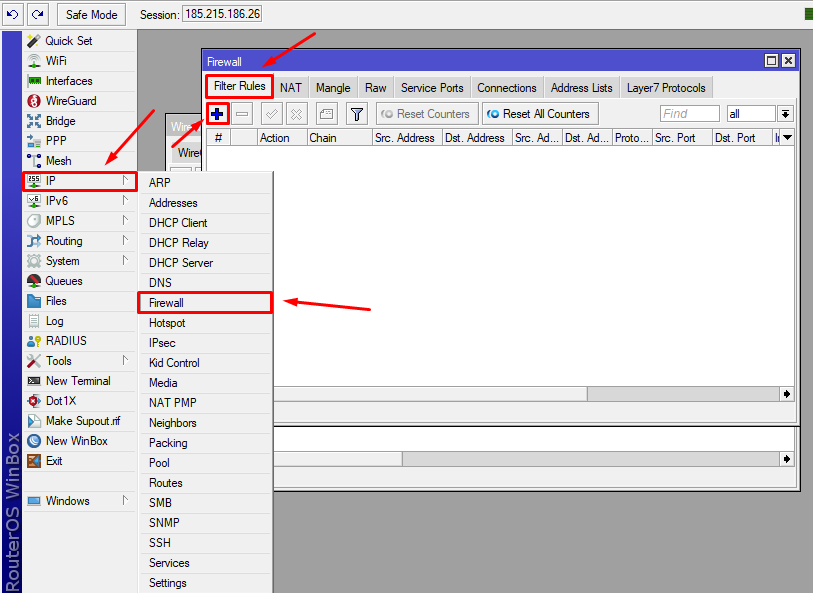
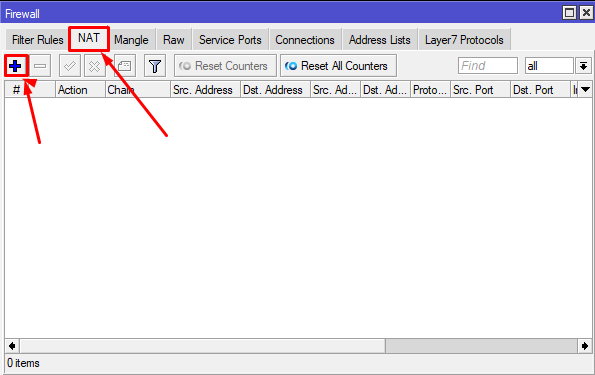
Now you need to configure the firewall and NAT rules.
Go to the IP - Firewall - Filter Rules tab. Click the “+” button.
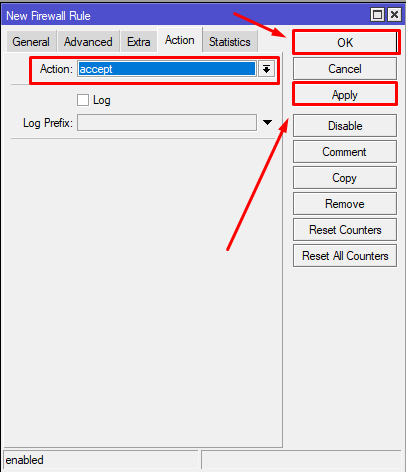
Let's add a rule to allow WireGuard.
In the General tab:Chain: InputProtocol: udpDst. Port: 51820
Then go to the Action tab.

In the Action tab, select accept. Click the “Apply” and “OK” buttons.
In the Action tab, select accept. Click the “Apply” and “OK” buttons.
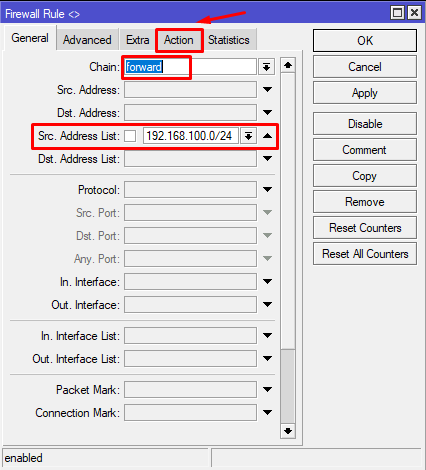
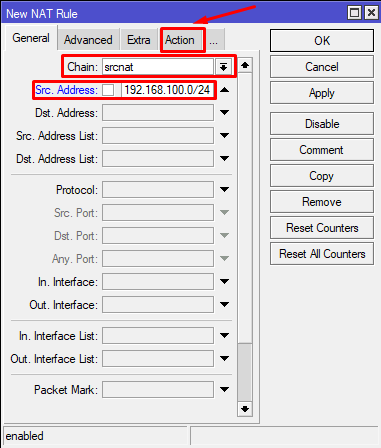
Now go to the NAT tab and add another rule for internet access.
In the General tab:Chain: srcnatSrc. Address: 192.168.100.0/24
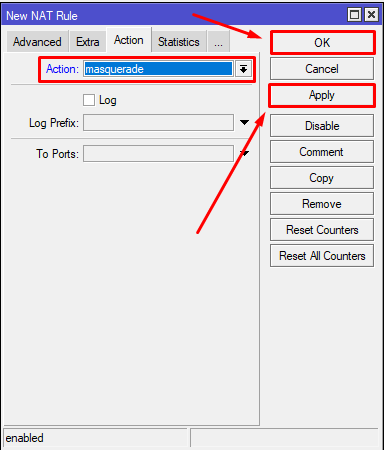
Then go to the Action tab.
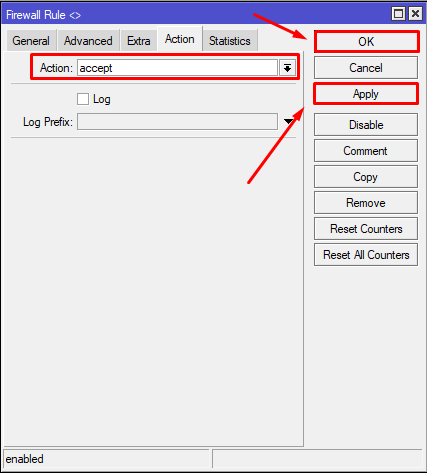
In the Action tab, select masquerade. Click the “Apply” and “OK” buttons.
The work on the RouterOS side is complete. Now, you need to configure the configuration file.
Insert the config into the WireGuard program.
[Interface]
PrivateKey = <Приватный ключ клиента>
Address = 192.168.100.2/24
DNS = 8.8.8.8
[Peer]
PublicKey = <Публичный ключ роутера>
Endpoint = <IP_адрес_роутера>:51820
AllowedIPs = 0.0.0.0/0
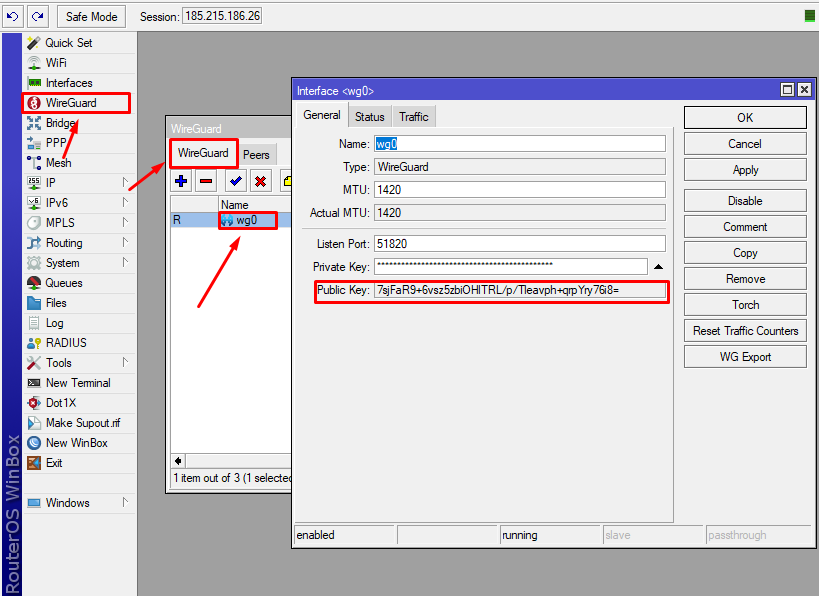
You can obtain the router's public key by going to the WireGuard section and opening the wg0 interface.
The configuration file should look something like this: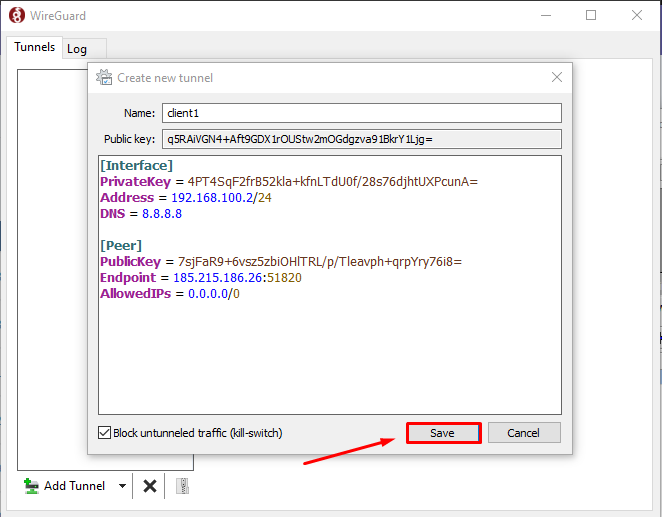
Activate the connection.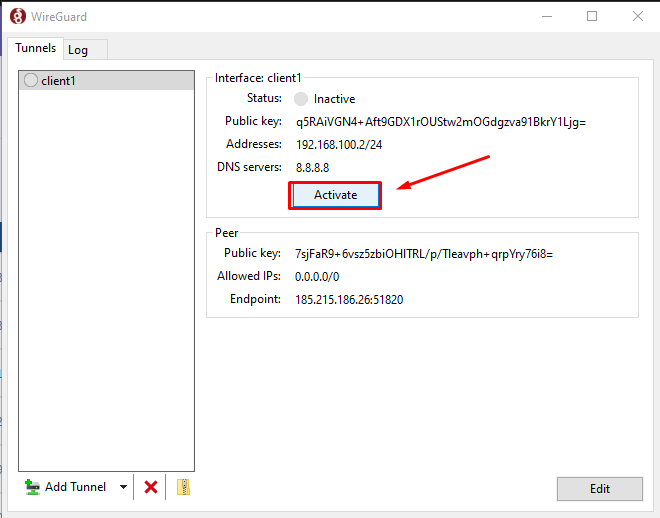
Try checking your external IP. It should change to the IP address of the router/server with RouterOS.
 Telegram Chat