


In order to connect to a VPN using different operating systems, you need to set up a VPN server. In this example, we will look at how to connect to an L2TP/IPsec VPN server on a MikroTik device. However, you can also use PPTP or other types of servers.
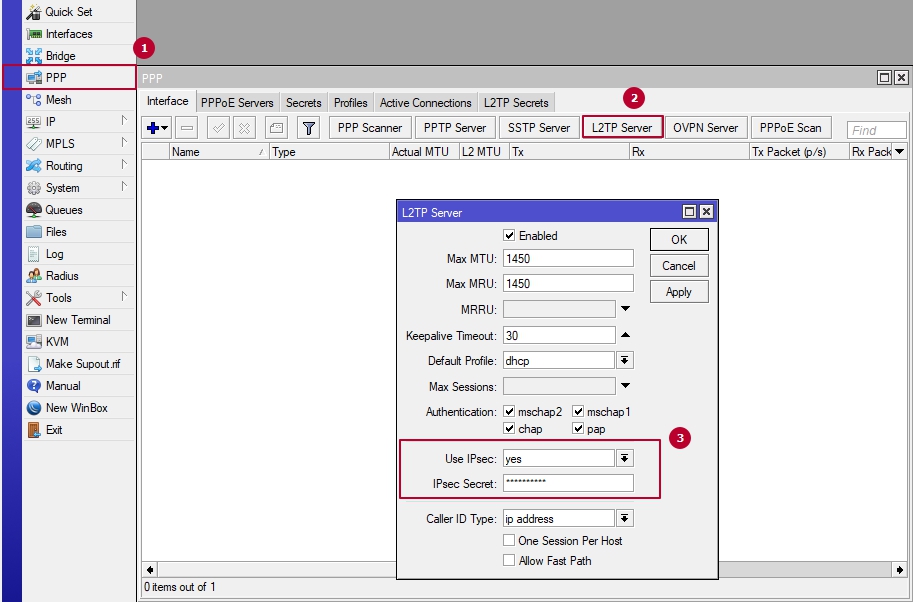
Earlier in Chapter 3, we discussed how to create an account for a VPN connection. Now we just need to go over how to set up the VPN server, and then step by step we’ll look at how to connect it.Log in to your router using WinBox and navigate to PPP Interface tab L2TP Server. As shown in the screenshot below, to activate the server, it’s enough to check Enable and select a Default Profile.
Note: Step 3 (Use IPsec) is optional! (See Screenshot 3.)
You only need to configure it if you're connecting to the VPN server from an iOS-based device (for example: iPhone or MacBook).
(Screenshot 3)
Connecting to an L2TP VPN using Windows 10
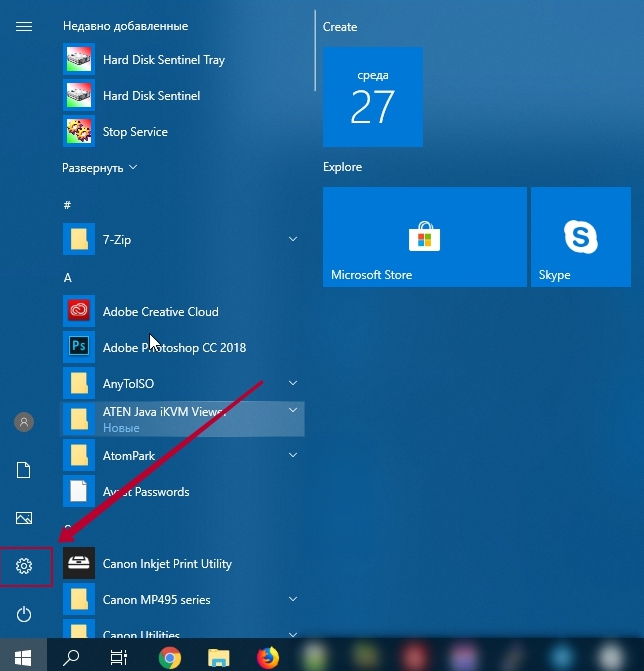
To do this, you need to go to the Start menu and select Options.
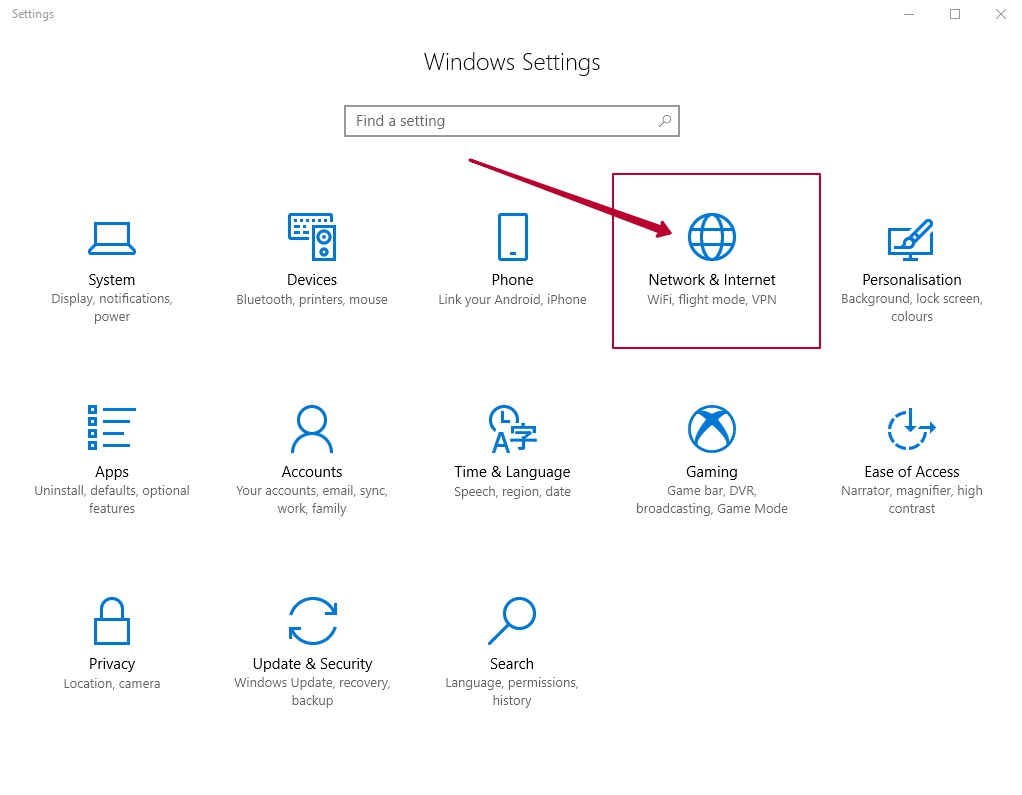
Next, go to the ‘Network and Internet’ tab.
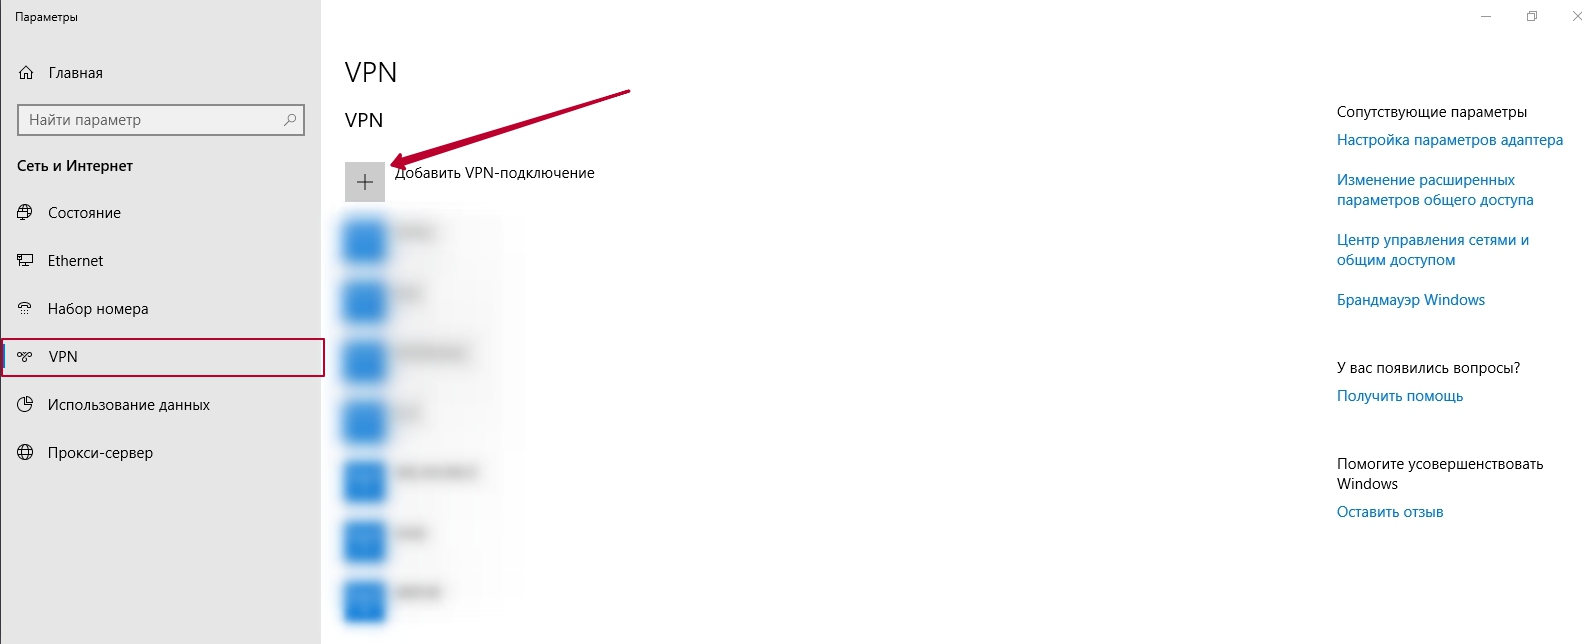
After that, select the ‘VPN’ tab and click ‘Add VPN Connection’.
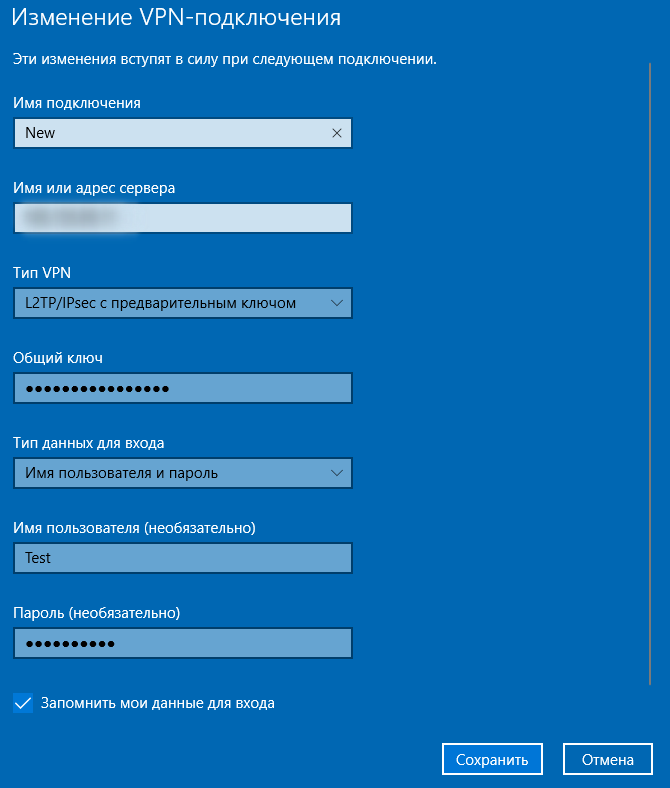
In the ‘Add VPN Connection’ window, you will need to fill in the fields.
VPN service provider (Windows built-in by default).
Connection name - any convenient name for you, which is displayed among other VPN connections.
Then set the IP address of the server you want to connect to.( router's external IP)
Type-VPN - select L2TP/IPsec with certificate.
For the Type of sign-in info, leave it as Username and password.
Username - enter the required username.
Password – enter the required password.
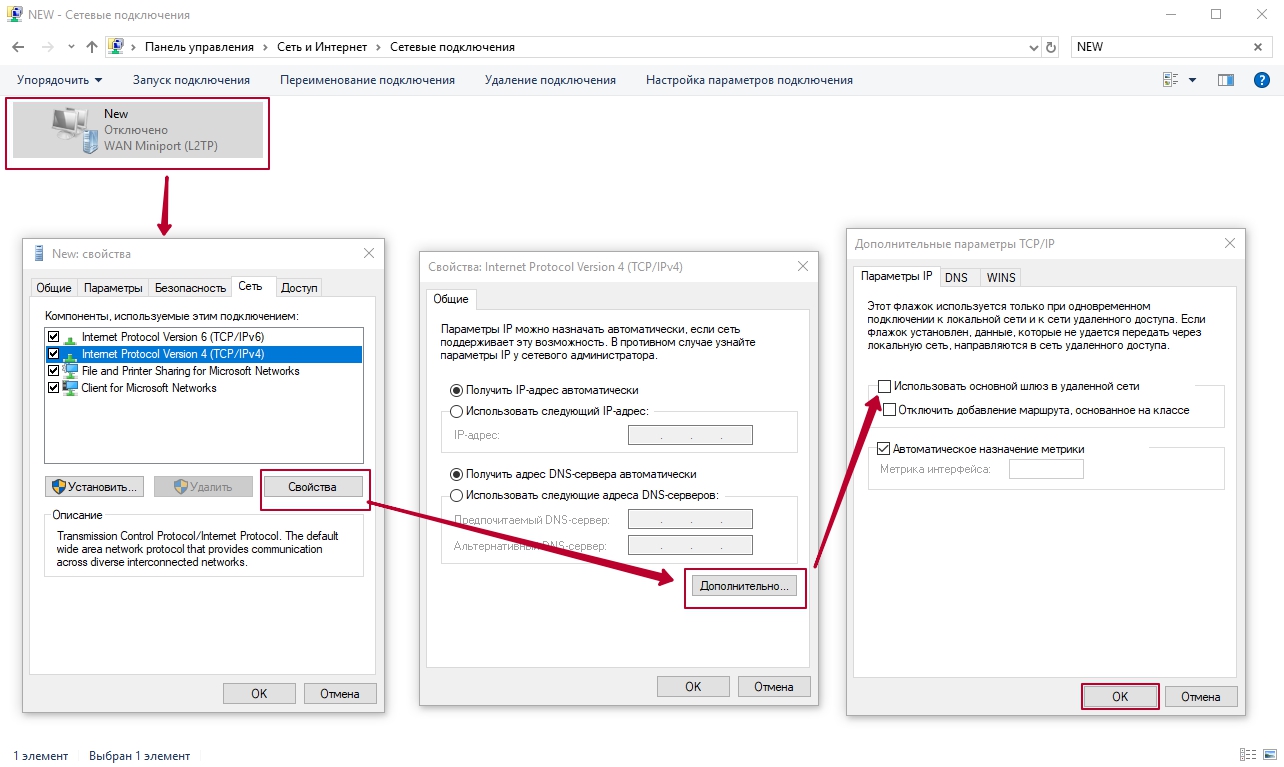
After you've configured the connection, you will see your newly added VPN connection in the list. However, before connecting, you need to make a change in the routing settings.
Attention!
If you don’t change anything, the system will start using the new VPN connection as the default gateway, and all other routes — including your internet connection — will become unavailable.
To make the necessary changes, go to the Advanced TCP/IP Settings tab and uncheck the option "Use default gateway on remote network".
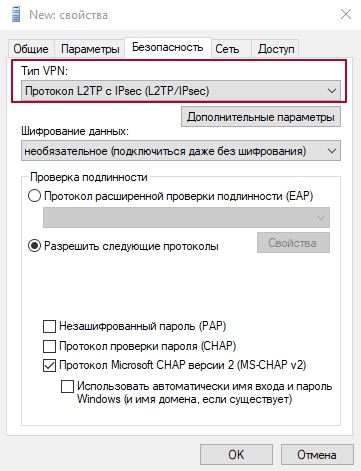
To speed up the connection process, you need to change the VPN type and click OK, as shown in this example:
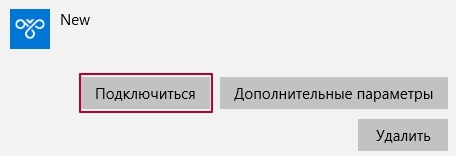
You can then connect via the network connection menu
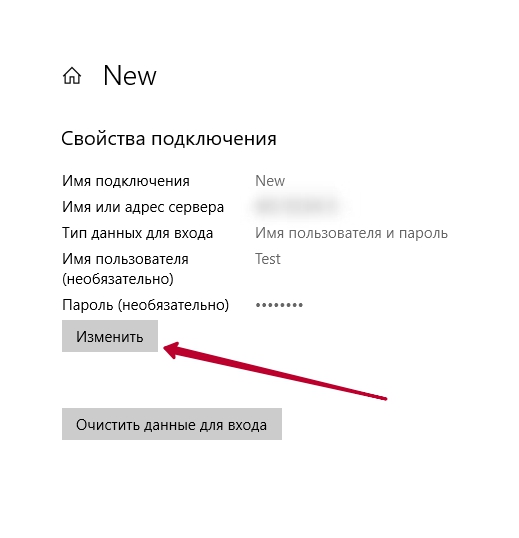
If you need to change the settings of this VPN connection, click on the ‘Advanced Settings’ button

Click the Change button, adjust the necessary settings, and try connecting again.
After that, the VPN connection setup is complete.
Connecting to an L2TP VPN using Android (example: Huawei P20 Pro)
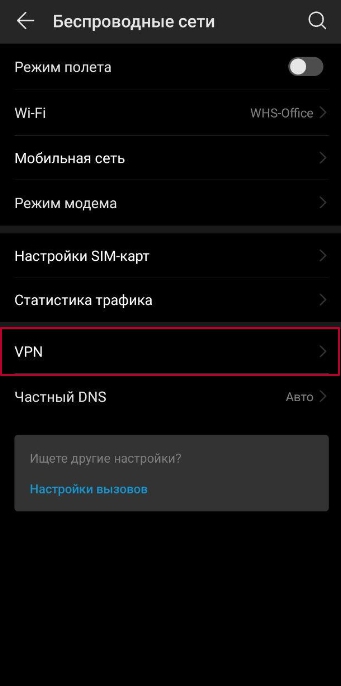
In this example, we will explain how to connect to a VPN using the Android operating system. Typically, the VPN function is located in the Settings menu. You can use the Google search engine to find out exactly where the VPN feature is on your specific device. In this example, the VPN option is found under Settings → Wireless & Networks.
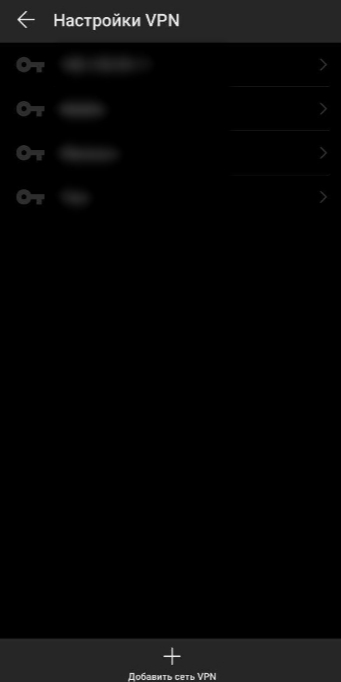
Tap the VPN button. After that, a blank window will appear, allowing you to add a new VPN network. Tap Add VPN network.
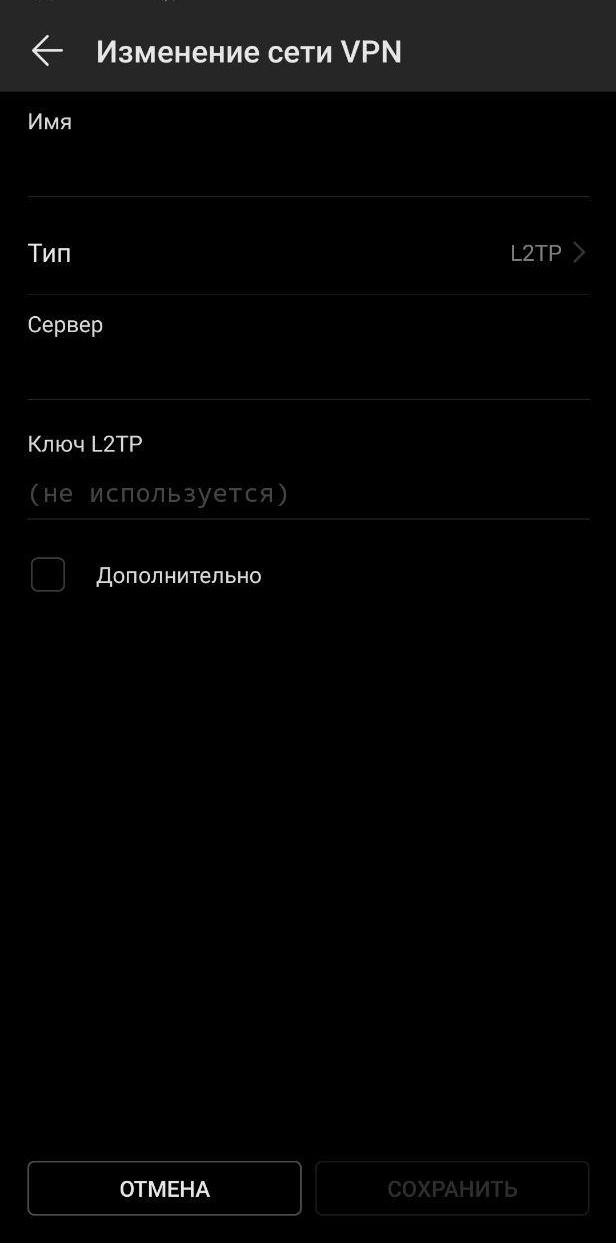
In the Edit VPN network field
Name – the connection name (any name convenient for you)
Type – L2TP (If PPTP is enabled on your router, you can use that as well)
Server – the IP address of your router
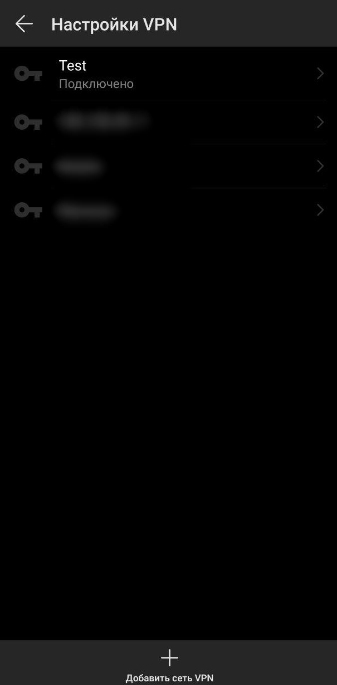
Next, your new VPN connection will appear in the list. Tap on it, then enter your username and password. Finally, tap the Connect button.

After that, you should see the message Connected. A key icon or the word VPN will appear at the top of the screen.
Connecting to an L2TP VPN Using an iPhone
Let's make one thing clear right away. It is not possible to connect to VPN on iPhone smartphones using PPTP protocol. Apple has disabled the ability to connect to PPTP VPN servers in iOS 10 on iPhone, iPad and iPod Touch.
In this example, we are using L2TP/IPsec VPN for the connection. Since L2TP is already configured, we now need to enable IPsec and perform a few additional settings.
Первым делом перейдите в настройки L2TP сервера и разрешите использование IPsec + введите IPsec Secret (см. Скриншот 3, глава 7). После этого приступаем к настройке непосредственно IPsec.
Attention! In this example we will configure L2TP/IPsec VPN for access from outside from any IP address (0.0.0.0.0/0). In your case it will be necessary to replace these numbers with other ones, if you want to restrict access.
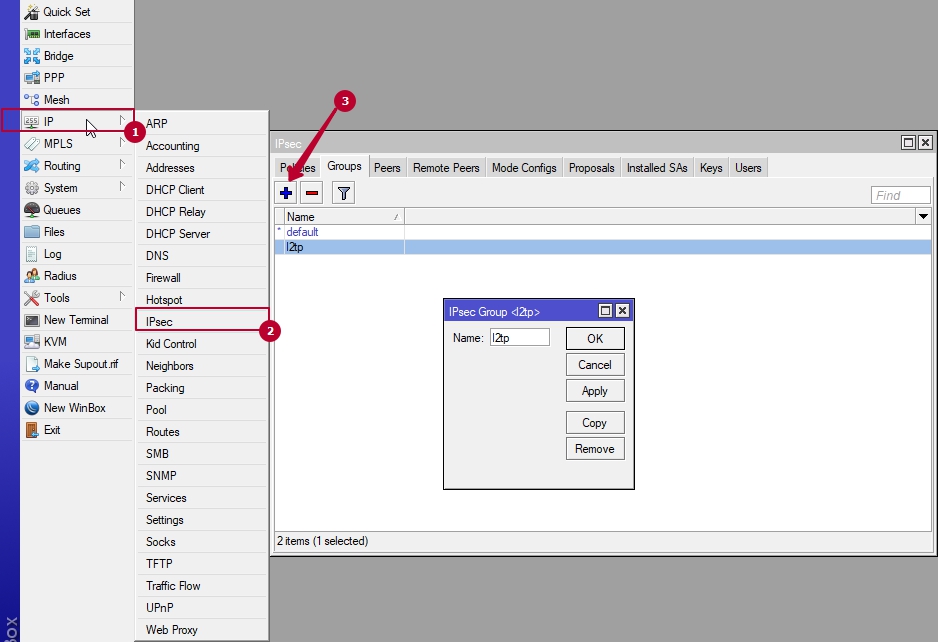
Let's create the "l2tp" group.
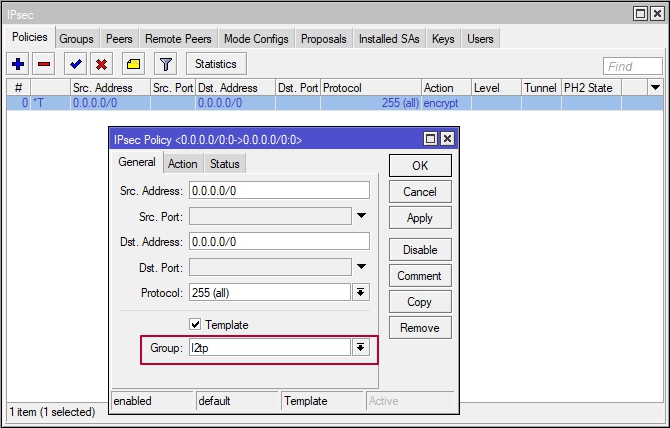
Scr. Address - Enter your external IP address in the appropriate field.
Dst. Address - remote IP from which the connection will be made.
Group - Select the previously created group named "l2tp".
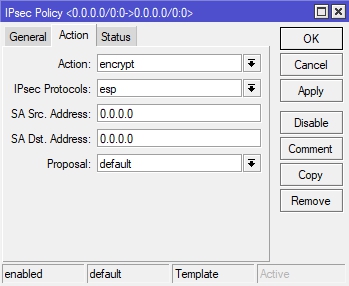
Go to the Action tab.
Action - encrypt
IPsec Protocols - esp
SA Scr. Address - Enter your external IP address.
SA Dst. Address - Enter the remote IP address.
Proposal - default
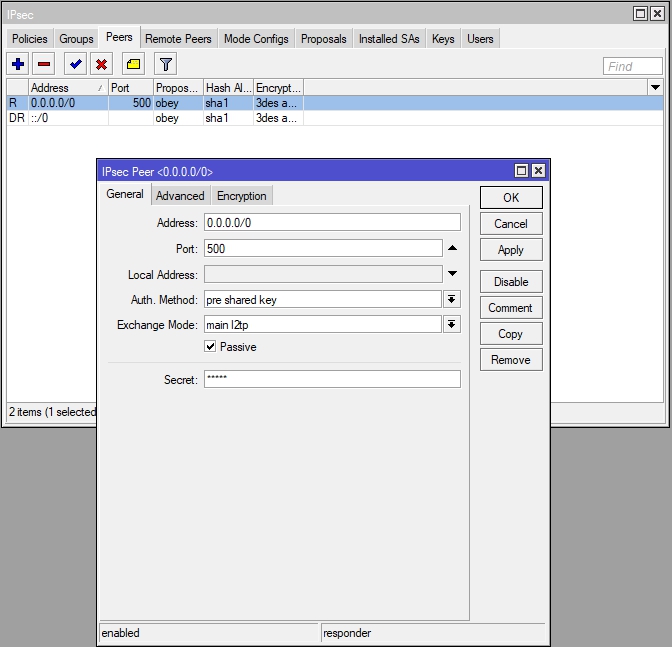
Go to the Peers tab and click the "+" button to add a new peer.
On the General tab, in the Address field, enter the remote IP address.
Port - 500
Auth. Method - pre shared key
Exchange Mode - main l2tp
Passive - tick the checkbox
Secret - Encryption key
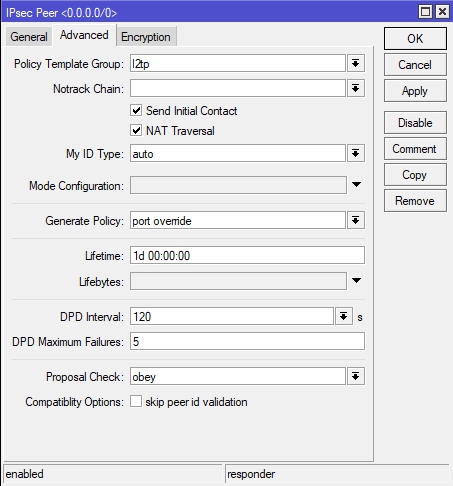
Go to the Advanced tab and configure it as follows
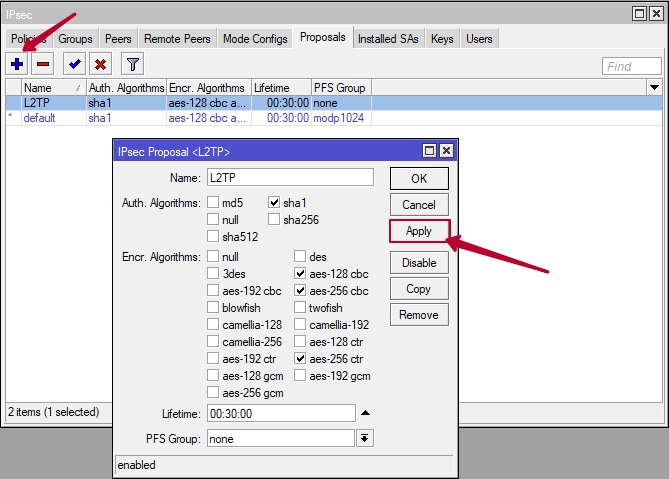
The last setting is the Proposal tab (set the following parameters)
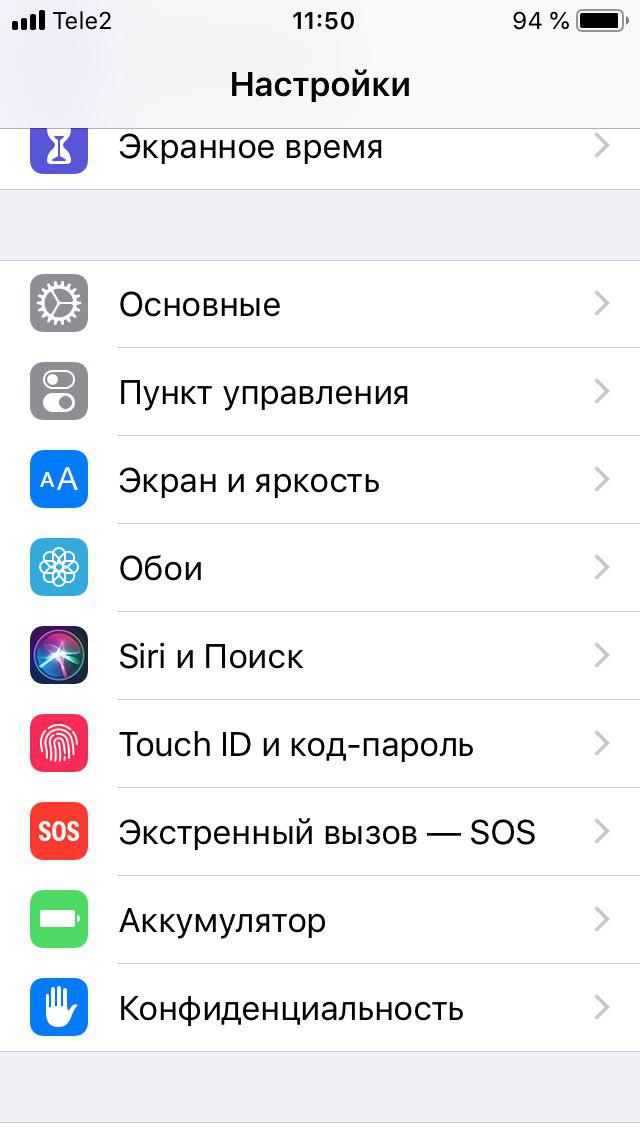
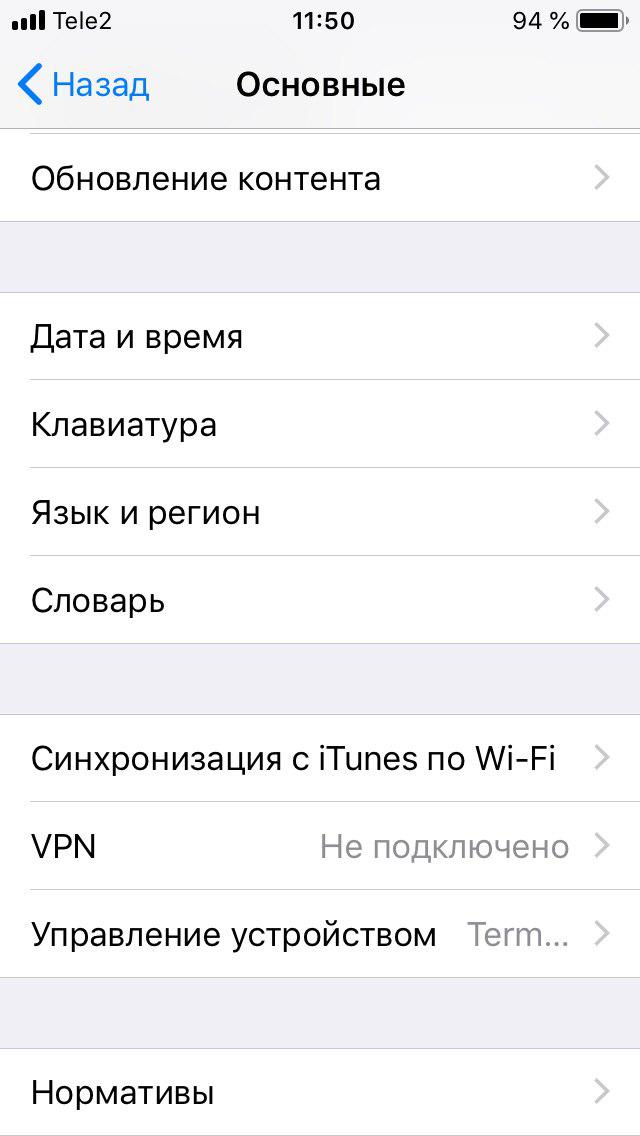
Now you can connect to the L2TP VPN server using your iPhone. Go to Settings and select General.
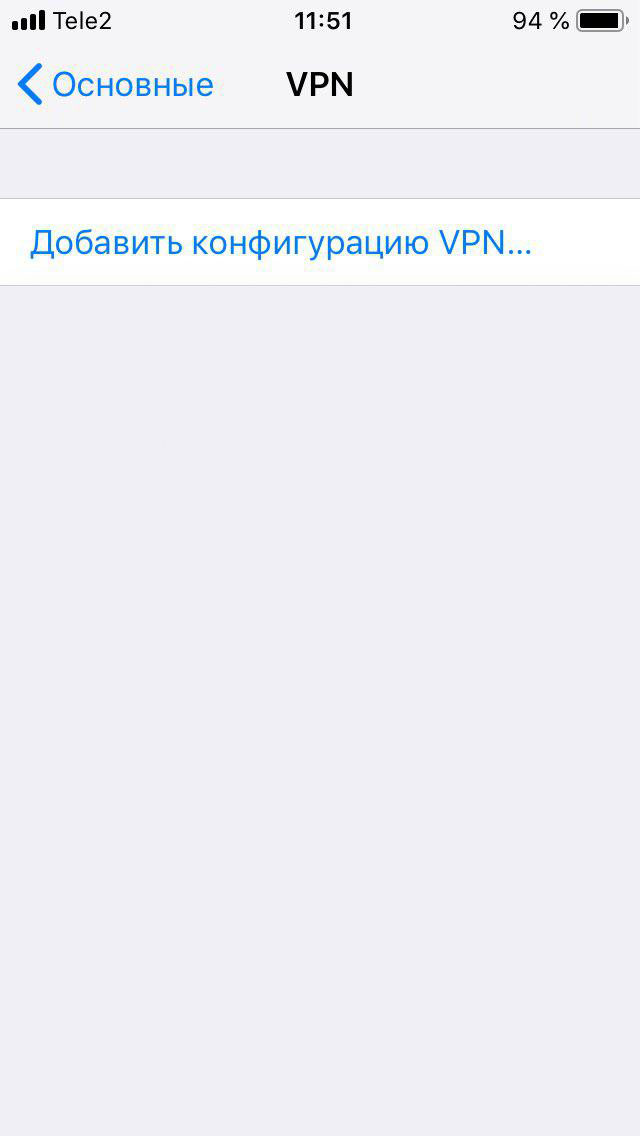
Next, select the VPN tab.
Добавьте новую конфигурацию VPN.
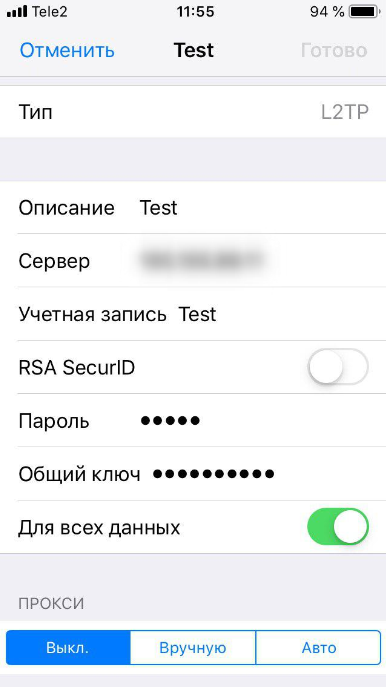
After that, fill in the fields:
Type - L2TP
Description – any name convenient for you
Server – the IP address of the server
Account – the user account created in PPP → Secrets
Password - created password
Shared key - IP->IPsec->Peers->Secret
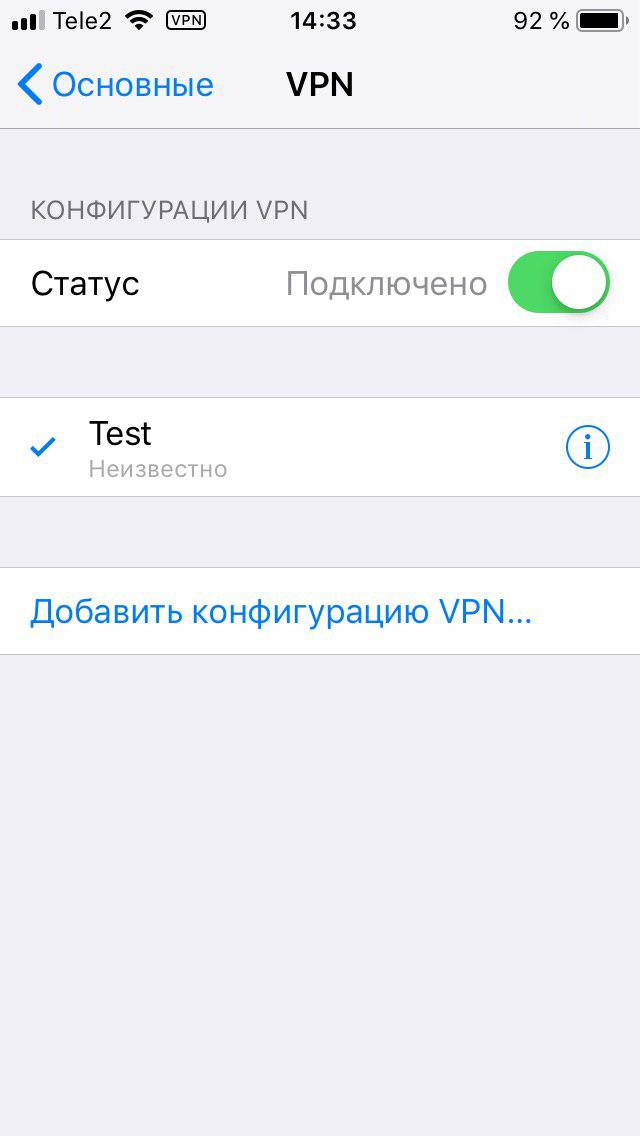
Once the entry has been added, click connect.
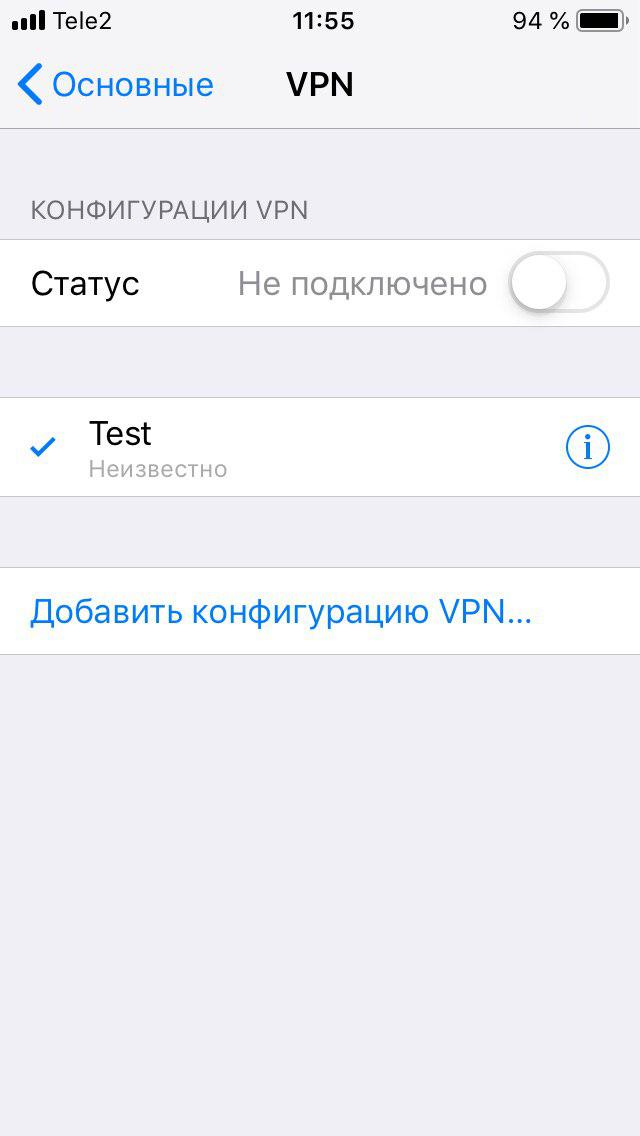
Once successfully connected, you will see the ‘VPN’ icon at the top of the screen.
 Telegram Chat