


Creation and installation of a paid SSL certificate.
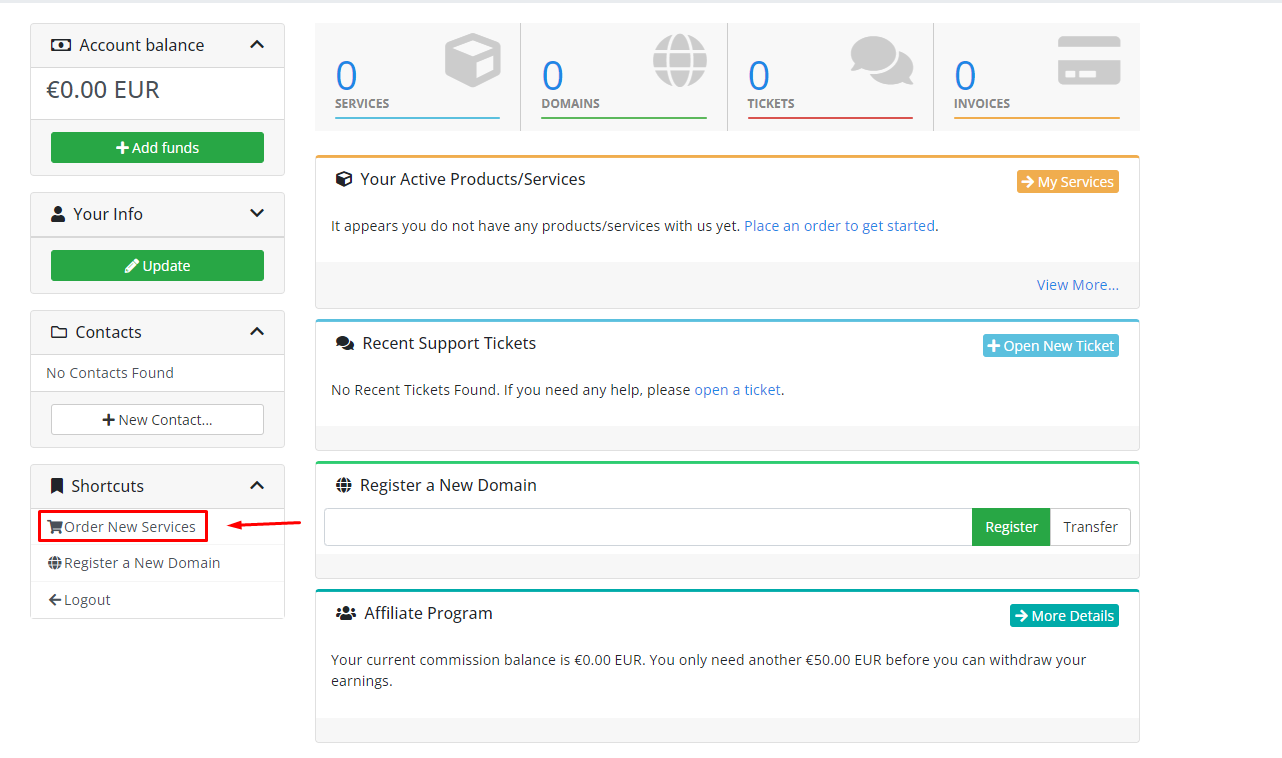
To create a paid SSL certificate, you first need to purchase it. Go to your account dashboard and select the "Order new service" option.
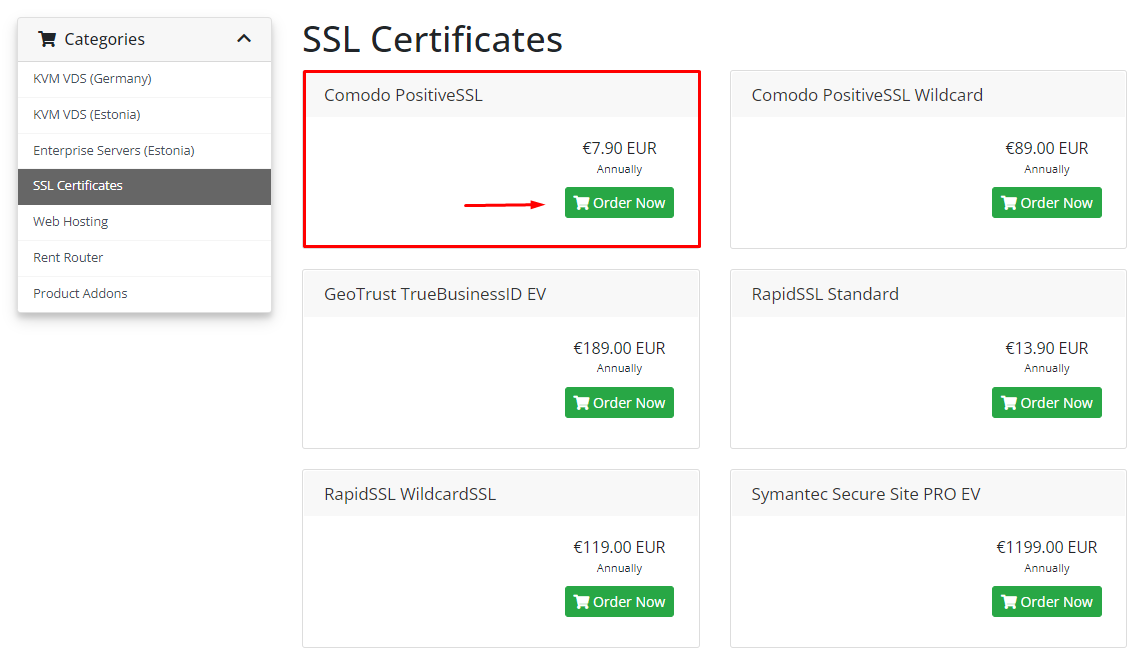
Then, select the desired SSL certificate. Comodo Positive SSL is very popular, so we will use it as an example. Order this service.
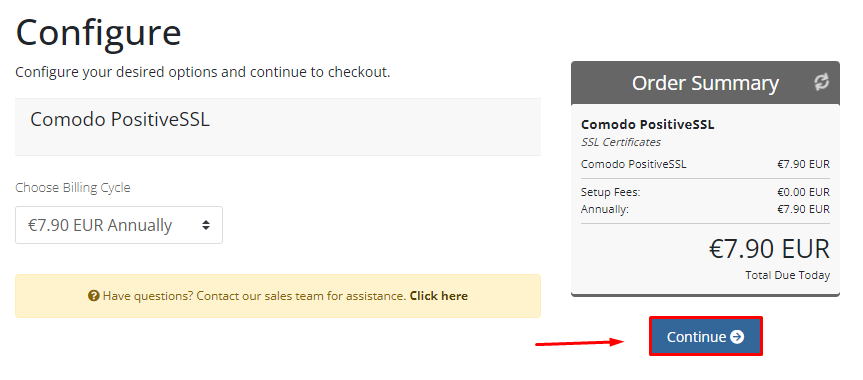
Choose the billing cycle, then click the "Continue" button. After that, complete the payment, and the service will be available in your account dashboard.
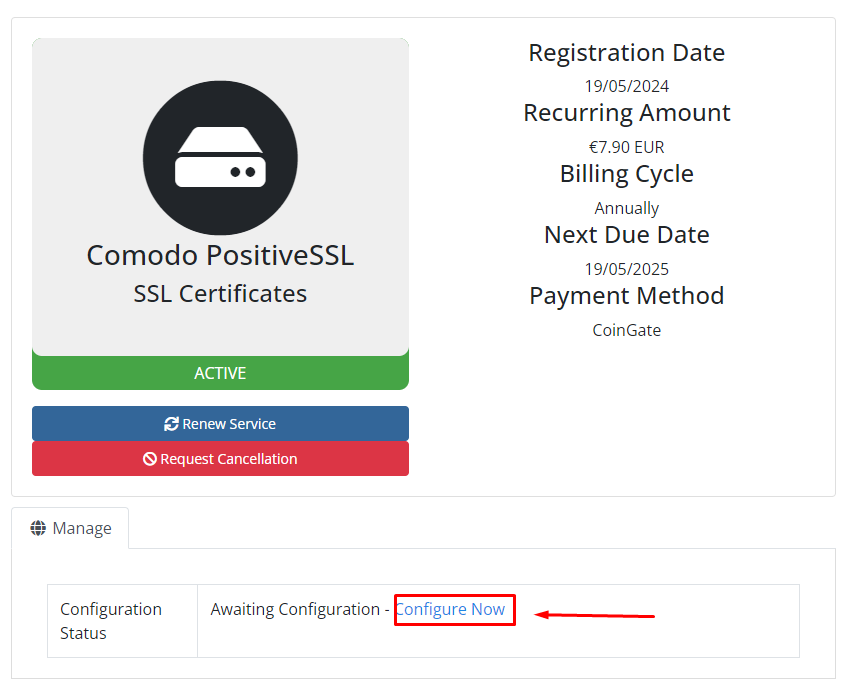
Select this service, then click the "Configure Now" button.
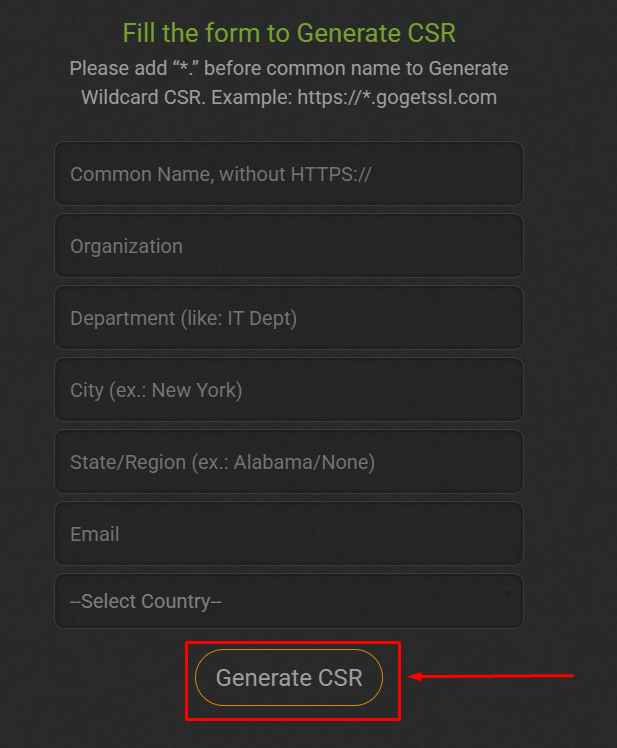
To proceed with the creation of an SSL certificate, we will need an external service to generate a CSR request. We recommend using this CSR generator. Scroll down the page and fill out the form. You need to provide:
-
Domain name without https:// ;
-
Organization. If you are an individual, write it in the format First Name Last Name Organization;
-
Department. You can write "IT DEPT";
-
City;
-
State/Province/Region;
-
Email;
-
Country;
Then click the "Generate CSR" button.
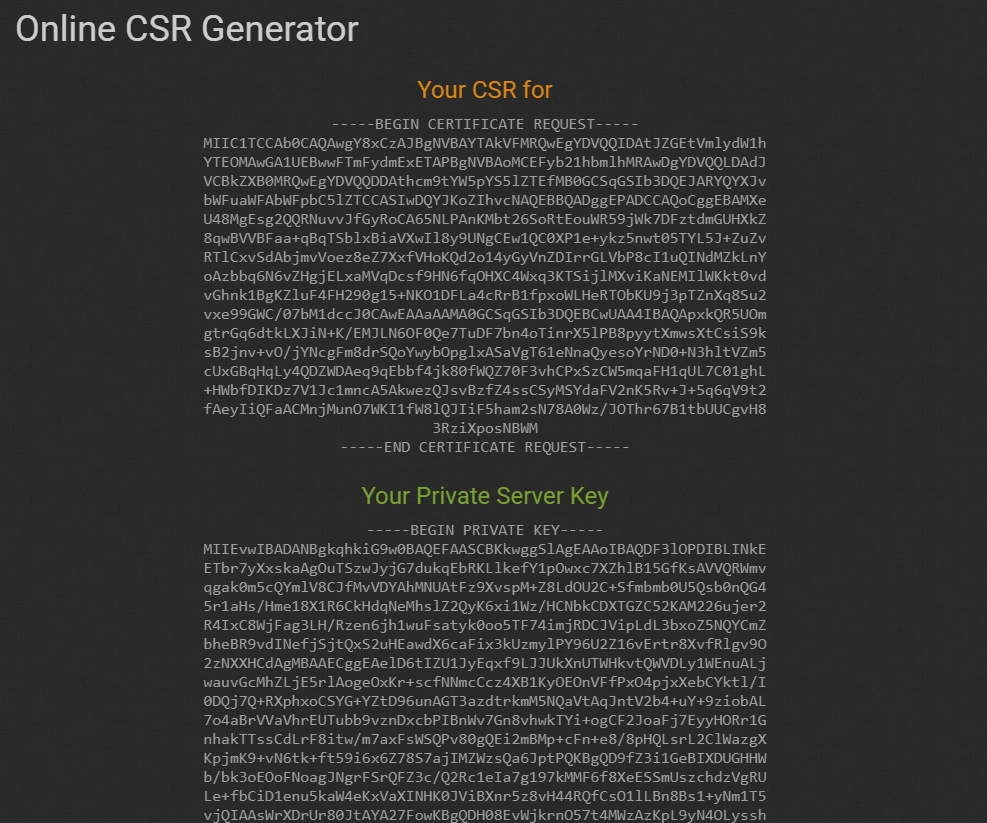
If you have done everything correctly, you will receive a CSR record and a private key. Save them. You will need them later.
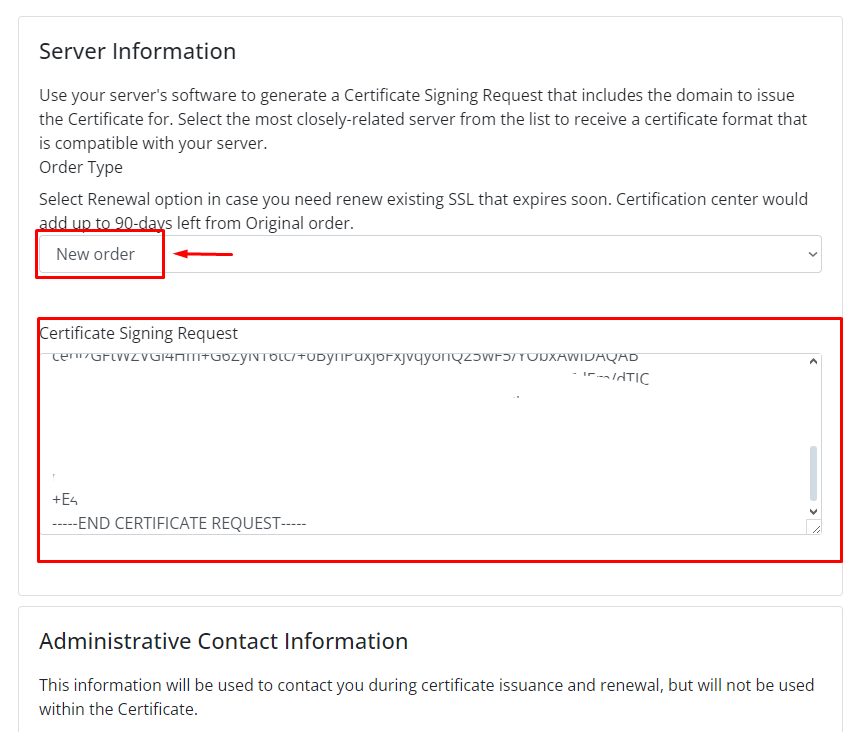
Now, in your my.fairyhosting.com account on the SSL certificate configuration page, select "New Order" and paste the CSR request into the text area.
Important: All entries you paste must include the full text, including "-----BEGIN CERTIFICATE REQUEST-----" and the end.
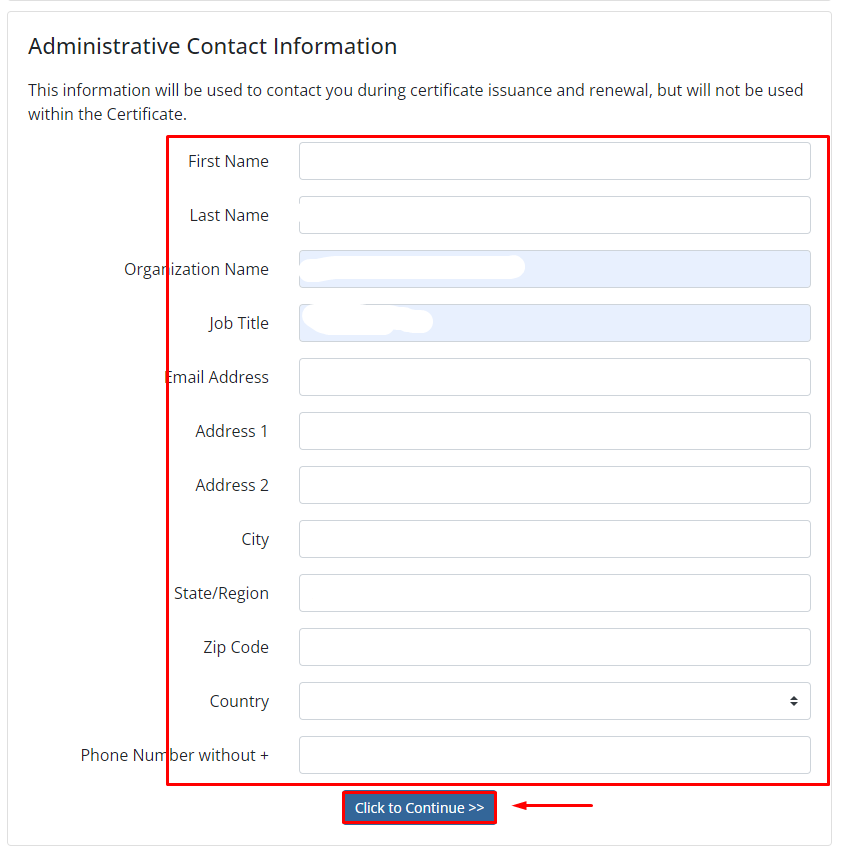
Now scroll down the page and fill in the fields with the information you provided when generating the CSR request. Then click "Click to Continue"
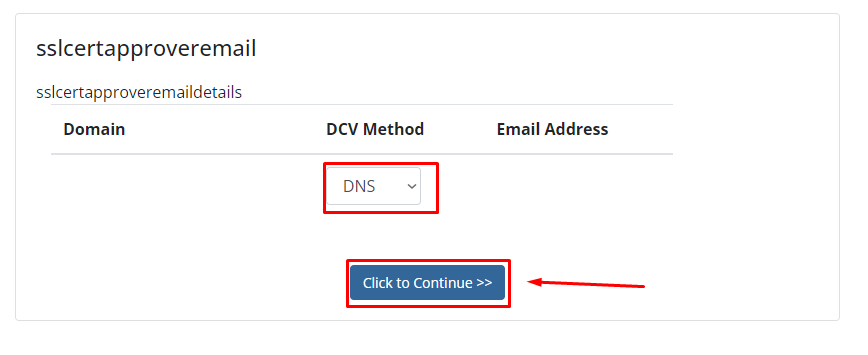
Now you need to choose a validation method. We recommend selecting the DNS validation method. Then click "Click to Continue".
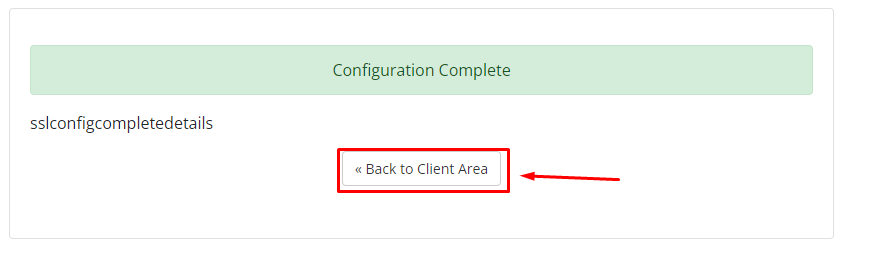
After that, the configuration will be completed, and you need to return to client area.
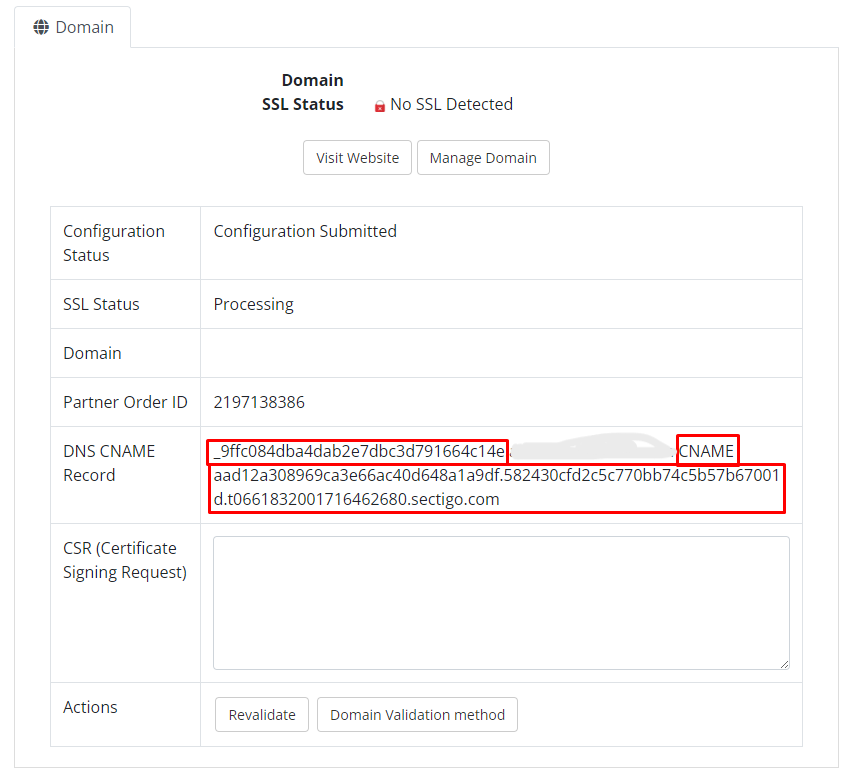
To pass validation, you need to create a CNAME record.
Validation of the SSL certificate for a website hosted on a virtual server
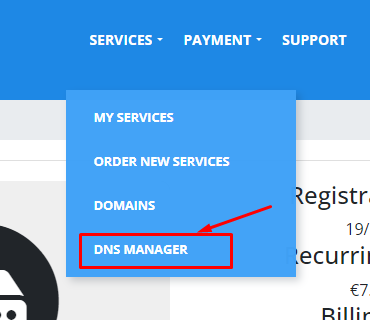
Select the DNS Manager service from the dropdown menu of services.
If you already have a domain visible in the DNS Manager, then navigate to it. If the domain is not visible, you need to add it. Click on "Add New Zone".

In the "Zone name" field, enter the name of your existing domain, for example, test-domain.com.
In the "IP Address" field, enter the IP address where your website is located. This is necessary so that when users enter your domain in the browser's address bar, they are directed to your site.
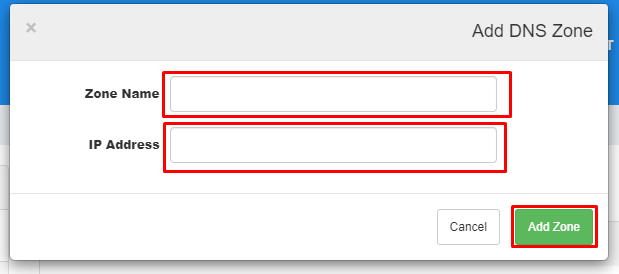
If you don't know the IP address of your website, it could be the virtual server you rent from us.
Then select your website in the manager.

Then click on the "Add Record" button.
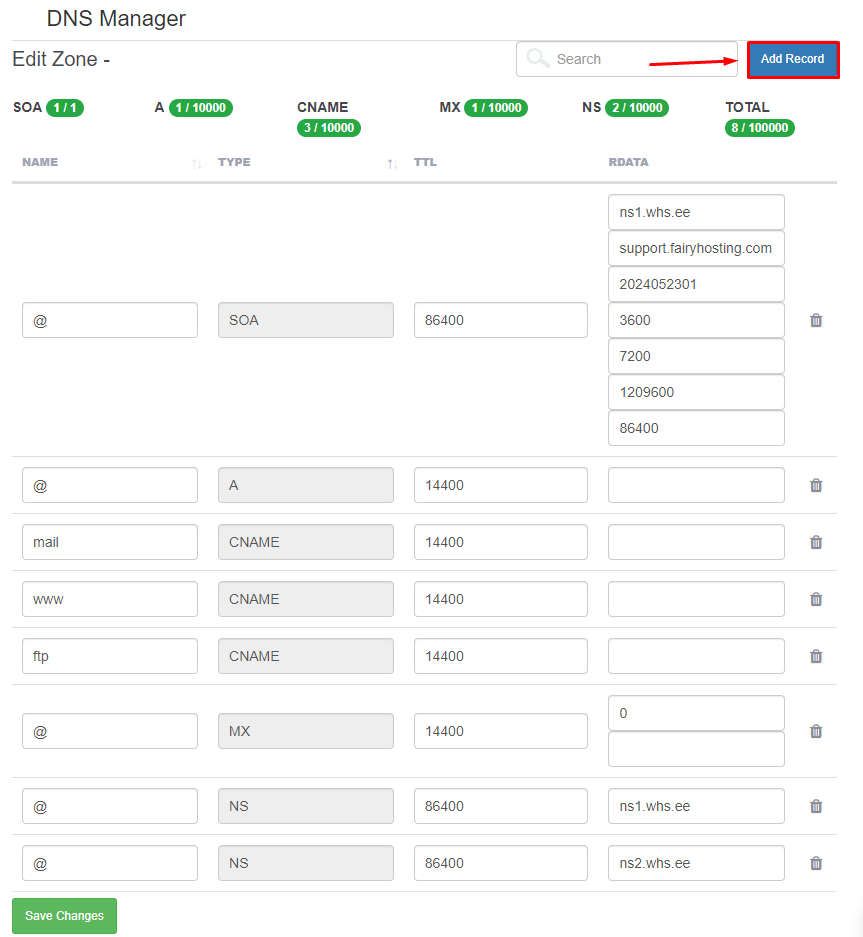
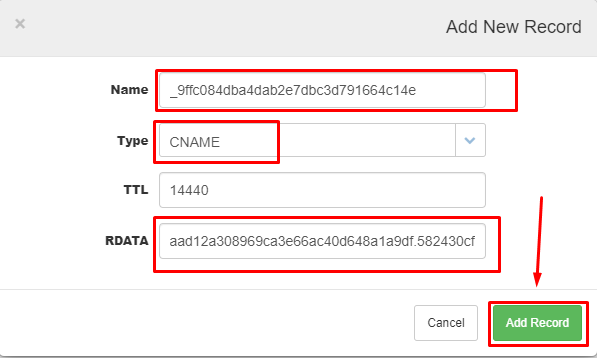
Select the record type "CNAME." In the first field, paste the text that comes before the dot. In the third field, paste the text that comes after the word CNAME. Then click on the "Add Record" button.
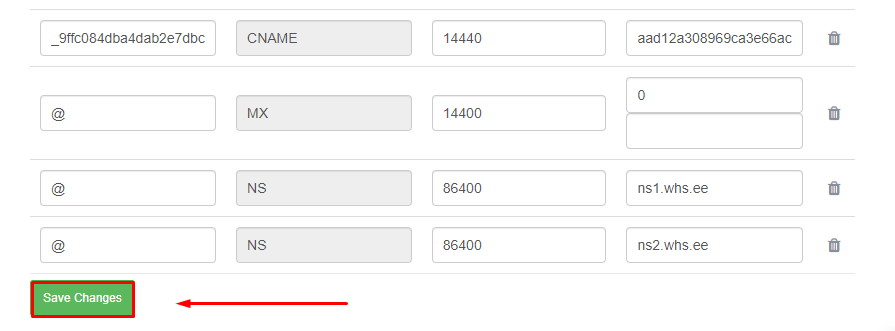
As we can see, the record has been successfully added. Now, you need to save the changes by clicking on the "Save Changes" button.
Validation of the SSL certificate for a website hosted on web hosting
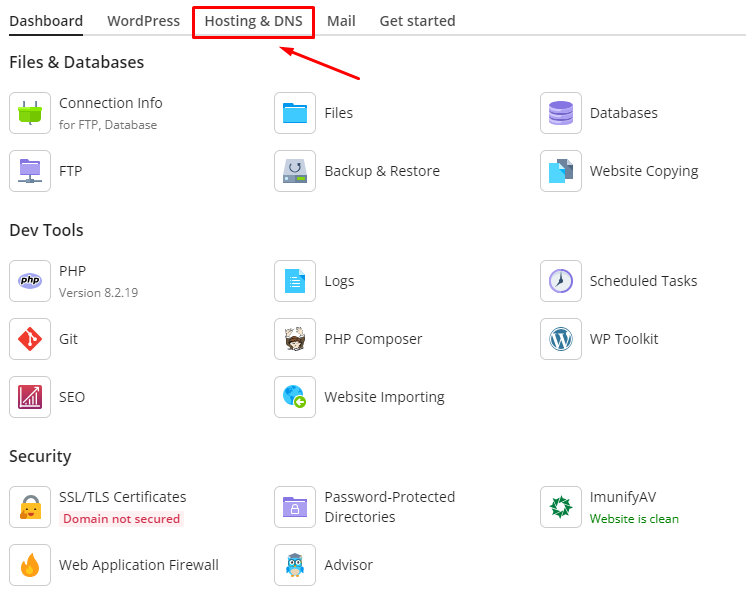
To add a CNAME record, go to the Plesk control panel where your website is hosted. Select the "Hosting & DNS" section.
Then select the "DNS" section.
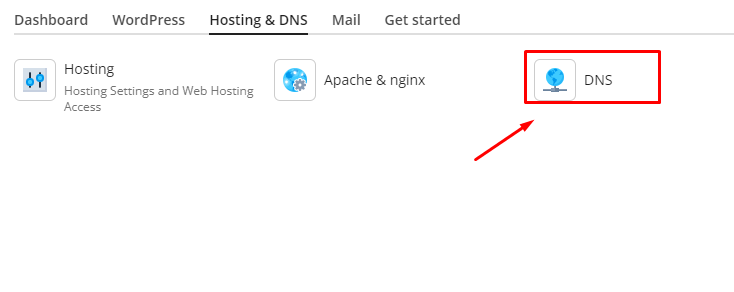
To add a record, click on the "Add Record" button.

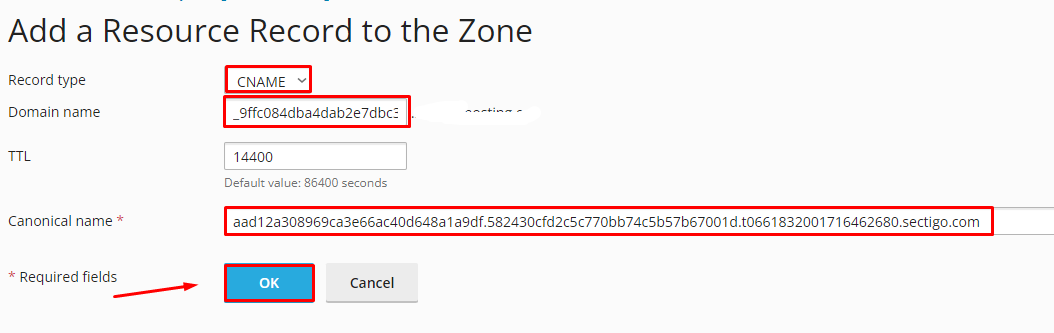
Select the record type "CNAME" In the first text field, paste the text that comes before the dot. In the third text field, paste the text that comes after the word "CNAME" Then click on the "OK" button.
SSL certificate validation
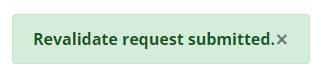
Now, return to your account dashboard and click on the "Revalidate" button.
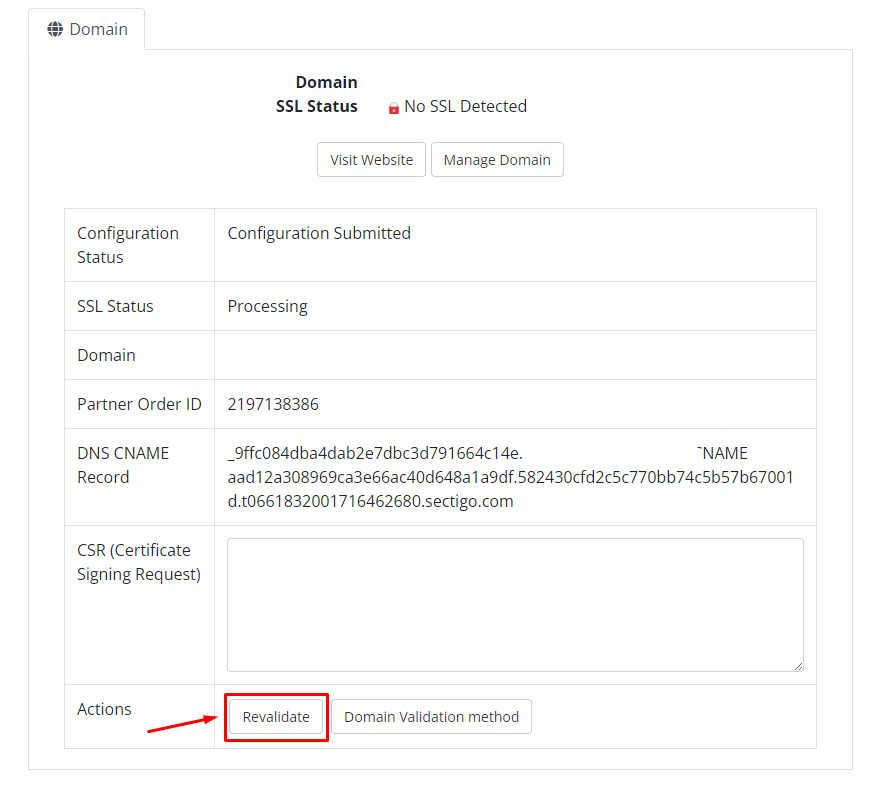
You will receive a notification confirming that the validation request has been successfully submitted. Refresh the page.
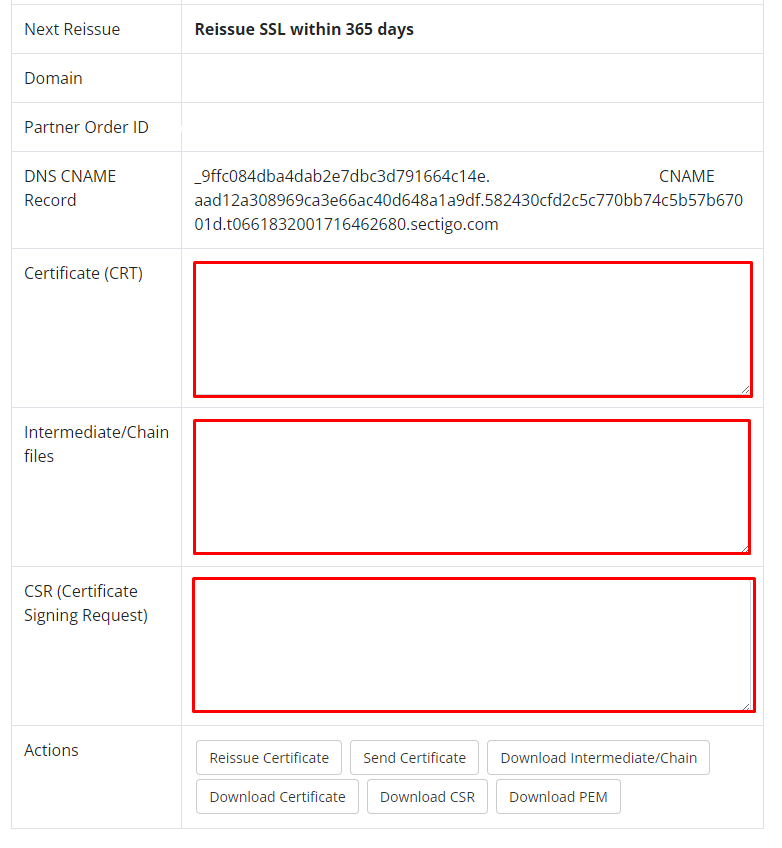
After refreshing the page, you will find the generated certificate (CRT) and the chain files (Intermediate/Chain files).
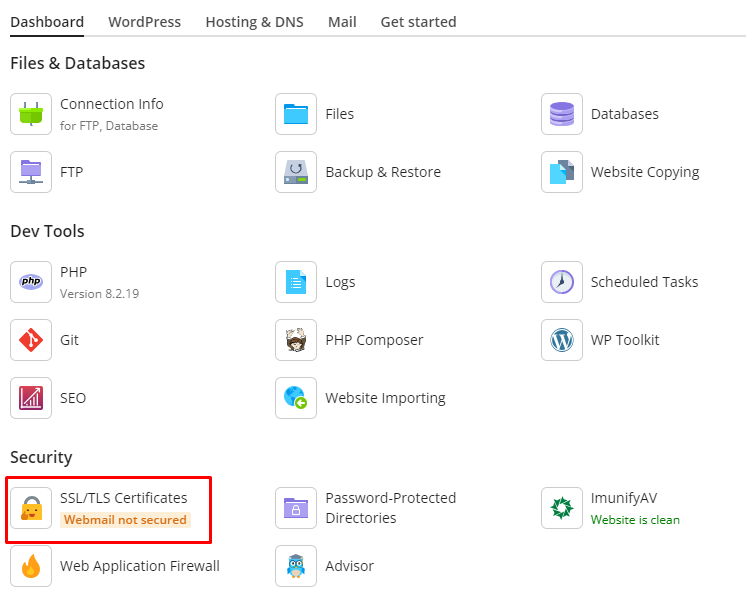
Now you need to install the SSL certificate on your website. Go to the control panel where your website is located. Let's consider Plesk as an example.
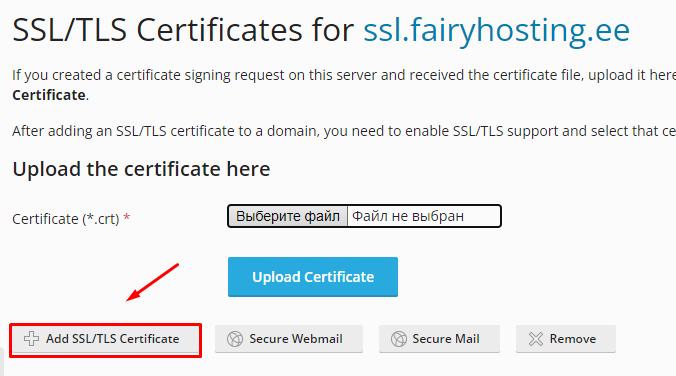
Select the "SSL/TLS Certificates" section.
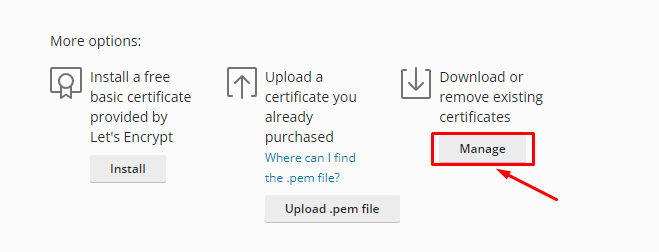
Scroll down and click on the "Manage" button.
Then click on the "Add SSL/TLS Certificate" button.
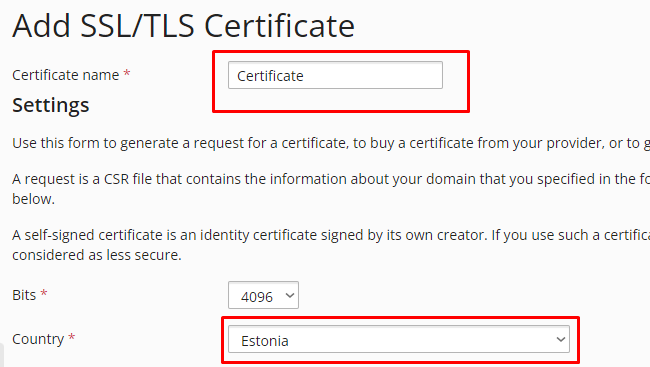
Fill in the highlighted fields, then scroll down a bit.
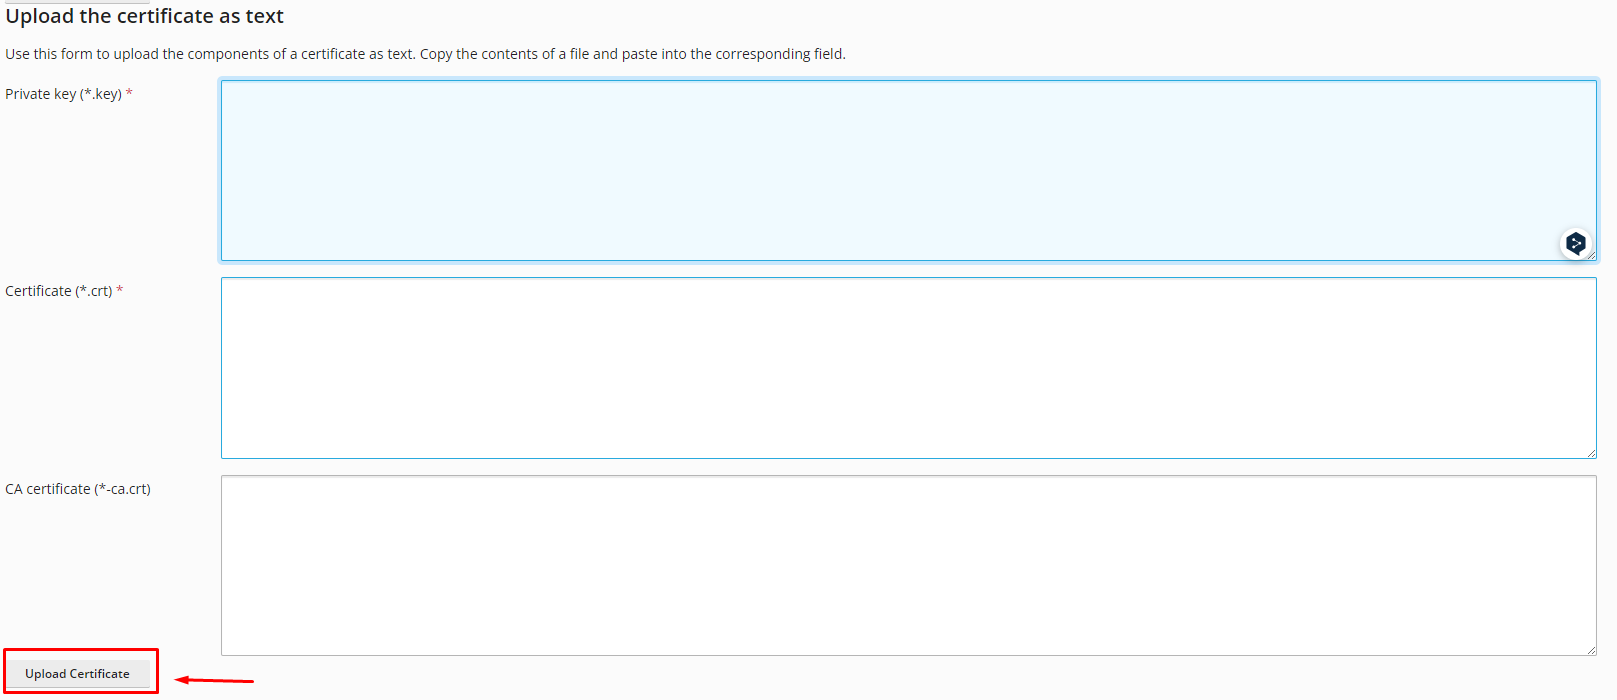
Here, you need to paste the text from the configured certificate in your account dashboard. Earlier, we asked you to save the private key. Please paste it into the first text area. In the second text area, paste the certificate. In the third text area, paste the chain. Then click on the "Upload Certificate" button.
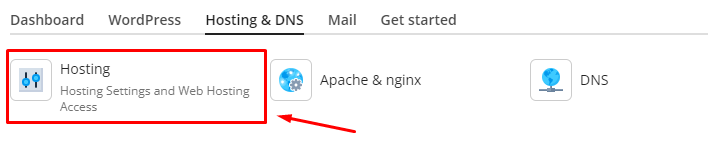
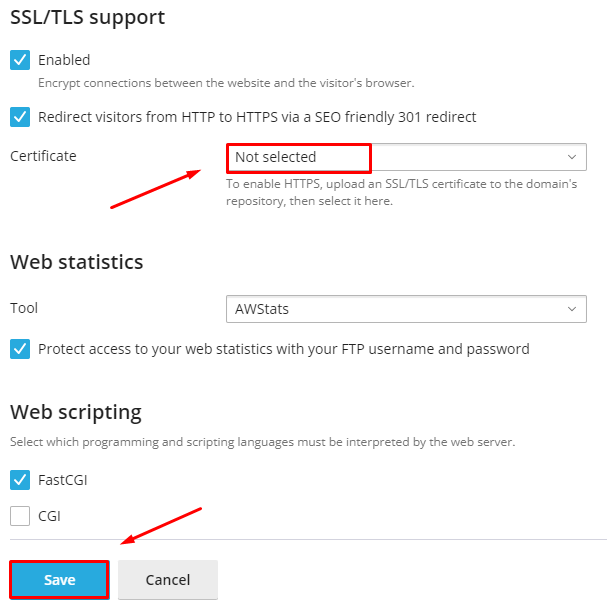
Then return to the "Hosting & DNS" section and select "Hosting".
Assign the certificate to the website, then click the "Save" button.
Congratulations! You have successfully installed the SSL certificate. To verify its functionality, we recommend using this service(clickable).
 Telegram Chat